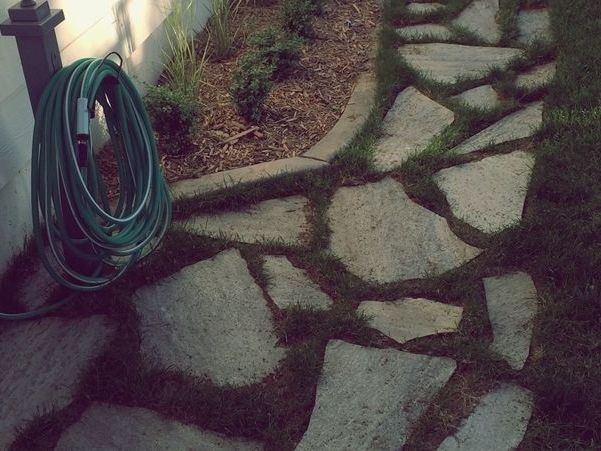
There is something timelessly appealing about a flagstone walkway for patio or backyard. Maybe it’s because it takes the guesswork out of wondering where, in fact, we should be headed.

It’s all laid out in front of us, and all we need to do is walk that way. Or maybe it’s appealing because it combines form with function – a beautiful way to keep the lawn from appearing trampled on a well-worn (albeit unofficial) path.
If your yard would benefit from a flagstone pathway, but you’re unsure of how to go about putting one in, this tutorial will give you the tools you need to get started. It’s not a super-fast home improvement project, but the process is satisfying and the result absolutely rewarding.

Flagstone is a sedentary sandstone used since the 1900s for landscaping. It’s lightweight, resistant to heat absorption, and typically pale in color. You’ll find them around pools, as pathways, or patios.
Flagstone pathways are an excellent alternative to concrete. It’s easy to powerwash, lays well, and has well-defined lines. Flagstone provides a smooth non-slip pathway that works well by pools. And you can evenly install them to prevent tripping.
Flagstone also comes in various sizes and colors, providing you with an array of options for style, design, and purpose using this stone. You can cut them evenly for a smooth, symmetrical surface. Or fashion the irregular stones for a more natural look.
Flagstone is typically cheaper than pavers. However, if you’re paying a landscaper to install flagstone and complete a whole project, it will cost more than pavers. The cost of flagstone also depends on the cut, size, color, and quality of the stone.

Flagstone is a suitable material to lay in dirt because it’s heavy and gives a rustic look to your outdoor space. You can lay flagstone on dirt with a few easy steps.
Give the walkway a few hours to dry before walking on it.
There are three primary ways you can cut flagstone. There are other ways, but experts recommend the following methods.
Determine the pathway area. This pathway will lead from the edge of a concrete patio, through the lawn, to the garden entrance. It will run about 3’ wide alongside a landscaped area.
Prepare the ground, if necessary. If parts of your pathway are not being laid onto existing lawn, (e.g., dirt or gravel), remove excess surface area and rake smooth and level.
Lay out the flagstone pieces. You don’t want to get halfway done with your walkway and realize you should’ve used a different stone somewhere back behind, so we highly recommend laying out all your flagstone pieces before you do anything else. This takes a little more time and effort, but it ensures that the end result is exactly what you want.
Tip: Pay attention to the color, smoothness, and cut of each flagstone piece and strategically choose which side you want facing up
Dig around one piece of flagstone. Using a hand shovel, with the blade as vertical as you can make it, dig carefully around a flagstone piece. For this step, you’ll want to go deep enough to be able to remove the piece of lawn as though it were sod.
Remove sod. Use a shovel (vertical blade) to go all around the sod, then lift it out. Lay the flagstone loosely in the hole to make sure it will fit.
Remove excess dirt, down to 4”-6”. The end goal is to have the top of your flagstone piece lie level with the line of your lawn (the top of the ground before the grass blades shoot up). Removing 4”-6” of dirt, depending on the thickness of your flagstone, will allow you to add enough sand to provide a leveling surface for the flagstone.
Pour 2”-4” of sand into the space. Smooth and level the sand evenly around the entire hole.
Replace flagstone on top of sand. Check for level. Adjust the sand level as needed, whether that means taking the flagstone out and adding more sand to one are or removing sand to lower the flagstone overall. Replace flagstone. Repeat as needed until the flagstone lies flat and at the appropriate height.
Step on flagstone, in multiple places, to ensure stability. If the flagstone moves or rocks at all, it is unstable and, therefore, unsafe. Readjust sand levels as needed until flagstone lies flat and securely on the ground, no matter where you step on it.
Congratulate yourself on a job well done…then move on to the next one. Continue this process until all stones are set into the ground.
Tip: If you do have non-grassy areas where your flagstone path will go, we found the most efficient method to be: remove top few inches of surface matter (e.g., dirt), cover entire area with 2” of sand, and lay flagstone rocks down in previously determined arrangement. Remove as much sand as possible from between the flagstones, then cut and set sod strips between them. That is what you see in this photo by the hose hanger.