
Fake stone you ask? Well, I’m gunna give it one helluva try, that’s for sure! Here’s my sad, pitiful story, as usual…..
The back of our lake house is, in my opinion, hideous! Well, instead of having to describe it, I’ll just show you a picture which shows where these fake stone panels will go!

In the last year we’ve removed all the stepping stones (they were NOT helpful at all when walking down to the dock) and of course all the “stuff”, to put it nicely, cluttered about. We did power wash that nasty white trellis, but it didn’t get as clean as I had hoped, hence this post!
I’ve been a little bored lately (I think I’m the ONLY person I know that gets so damned bored when I don’t have a project to work on) so shoot, what have I got to lose trying to make fake stones!
I started with a sheet of 3/4″ Polystyrene. I bought it in Lowe’s for $12.99 for a 4′ x 8′ sheet. I then got the supplies I thought I would need.
Spray paint the color I wanted my grout and stones to be, with additional colors that I could use to give it depth, a soudering iron, a heat gun (purchased at Home Depot for $10), a spray bottle and a sea sponge, although to be honest, I ended up not really using it. Anytime I needed to blend, I found it easier to use a wet cloth. No doubt, I had to add a bunch and actually not use some as the project progressed.


This really is a simple project. Bear with me (grab a cup of coffee or a glass of wine and try not to conk out!), I’ll walk you through it.
Like I said, I bought polystyrene, which is sheet insulation. Here’s a picture of the first sheet I bought and cut in half to try out different techniques. Afterward, I worked on them whole because I need a height of 5′ to 7′, depending on the slope of the yard.

Either side of it will work. Don’t forget to pull off that clear sheet that covers it. I had a heck of a time a few times trying to find it, even using the corner, but once you do, it’ll tear right off.
I then drew out my pattern. I just freehanded it. I wasn’t going for a brick look, so I just drew weird shaped stones!

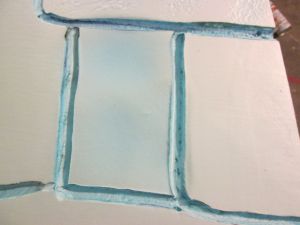
Since the soudering tool was going to melt the foam not only in depth, but about 1/4″ to 1/2″ wide, that’s what I used for my “grout”.
Be certain you don’t push down too hard with the soudering iron so you don’t go all the way through the foam. Just let it glide as you move your hand along your lines. You can also see that I tapped and rolled the tool to distress it.

Next, you might want to rough up your foam so it’ll look more realistic. I ended up getting very carried away with this part! Too damned fun. On some of my stones I used a wire brush, and on all of them, I used a spray bottle and my heat gun.

If you mist your different stones, and use the heat gun, you’ll get this look:

If you spray the water heavier, producing larger water drops and then almost “chase” them with your heat gun, you’ll get this look:

If you don’t use water at all, you’ll still melt the foam, but it’ll be smooth, like this:

Now, after you have your “stones” looking the way you want them to, it’s now time to paint the grout. I used a dark gray, but ran out, so on the last sheet, I used black and then brown. Each of these, at the very end, I sprayed white on them, so as to give them an old look. Plus, spraying the grout lines produces an overspray so it highlighted the stones the way I wanted.

Now it’s time to play around with your colors. I wanted sand/brownish, so I used gray, brown, tan and almond to get the effect I wanted. The spray kindof does what the sponge would do. Spraying it about two feet away makes it mist and gave it highlights, giving the illusion of depth. Just start spraying your paint in layers. I also sprayed black in the deeper areas that I had distressed, and then highlighted the edges of those areas.
I also used some dark yellow and highlighted certain areas. That’s where I used a wet rag and dipped it in the yellow and then blotted it off.
Again, I ended the painting by spraying over my grout lines with white. I like the look it gave me.
So, allll of this being said (whew, you actually made it to the end!), I installed one piece of it up at the lake. I’ll start putting the larger pieces up tomorrow. I’ll just attach the foam boards, after measuring and cutting them of course, and screw them using a screw and foam washer so the washer doesn’t go through the foam board. There’s no doubt, once you squirt the water and use the heat gun, it strengthens the foam a lot.
So here’s the one piece I was able to put up today. More pictures to come!
