CRONOGRAMA:
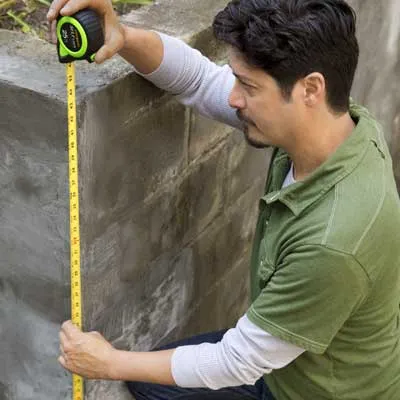
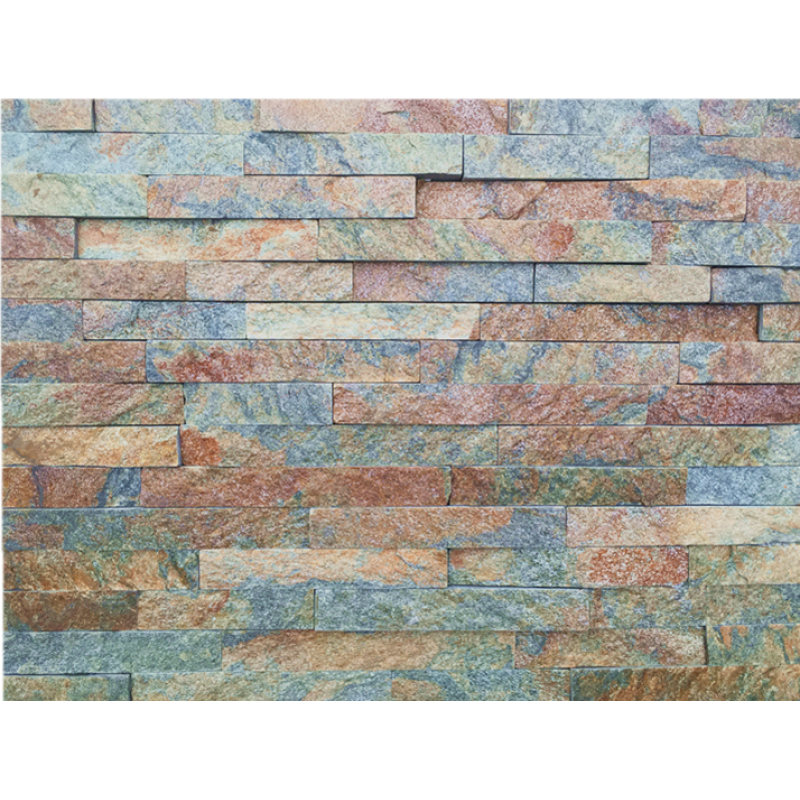
To calculate the number of universal corners to order, measure the height in inches of each outside wall corner, as shown, divide by 16, and round up to the nearest whole number. You’ll fill the area between the corners with flat panels. To calculate how many you’ll need, multiply the wall’s width by its height in feet and divide the resulting area by 2 (each panel covers 2 square feet). Subtract the number of universal corners from the result, then add 10 percent to your order of flat panels. Add one universal corner to be safe.
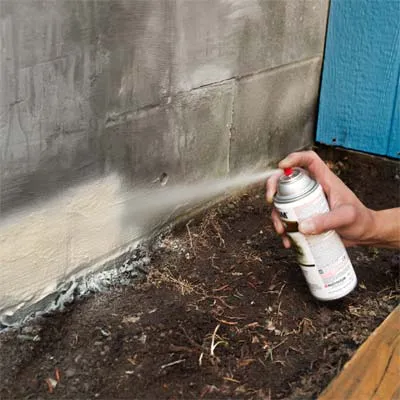
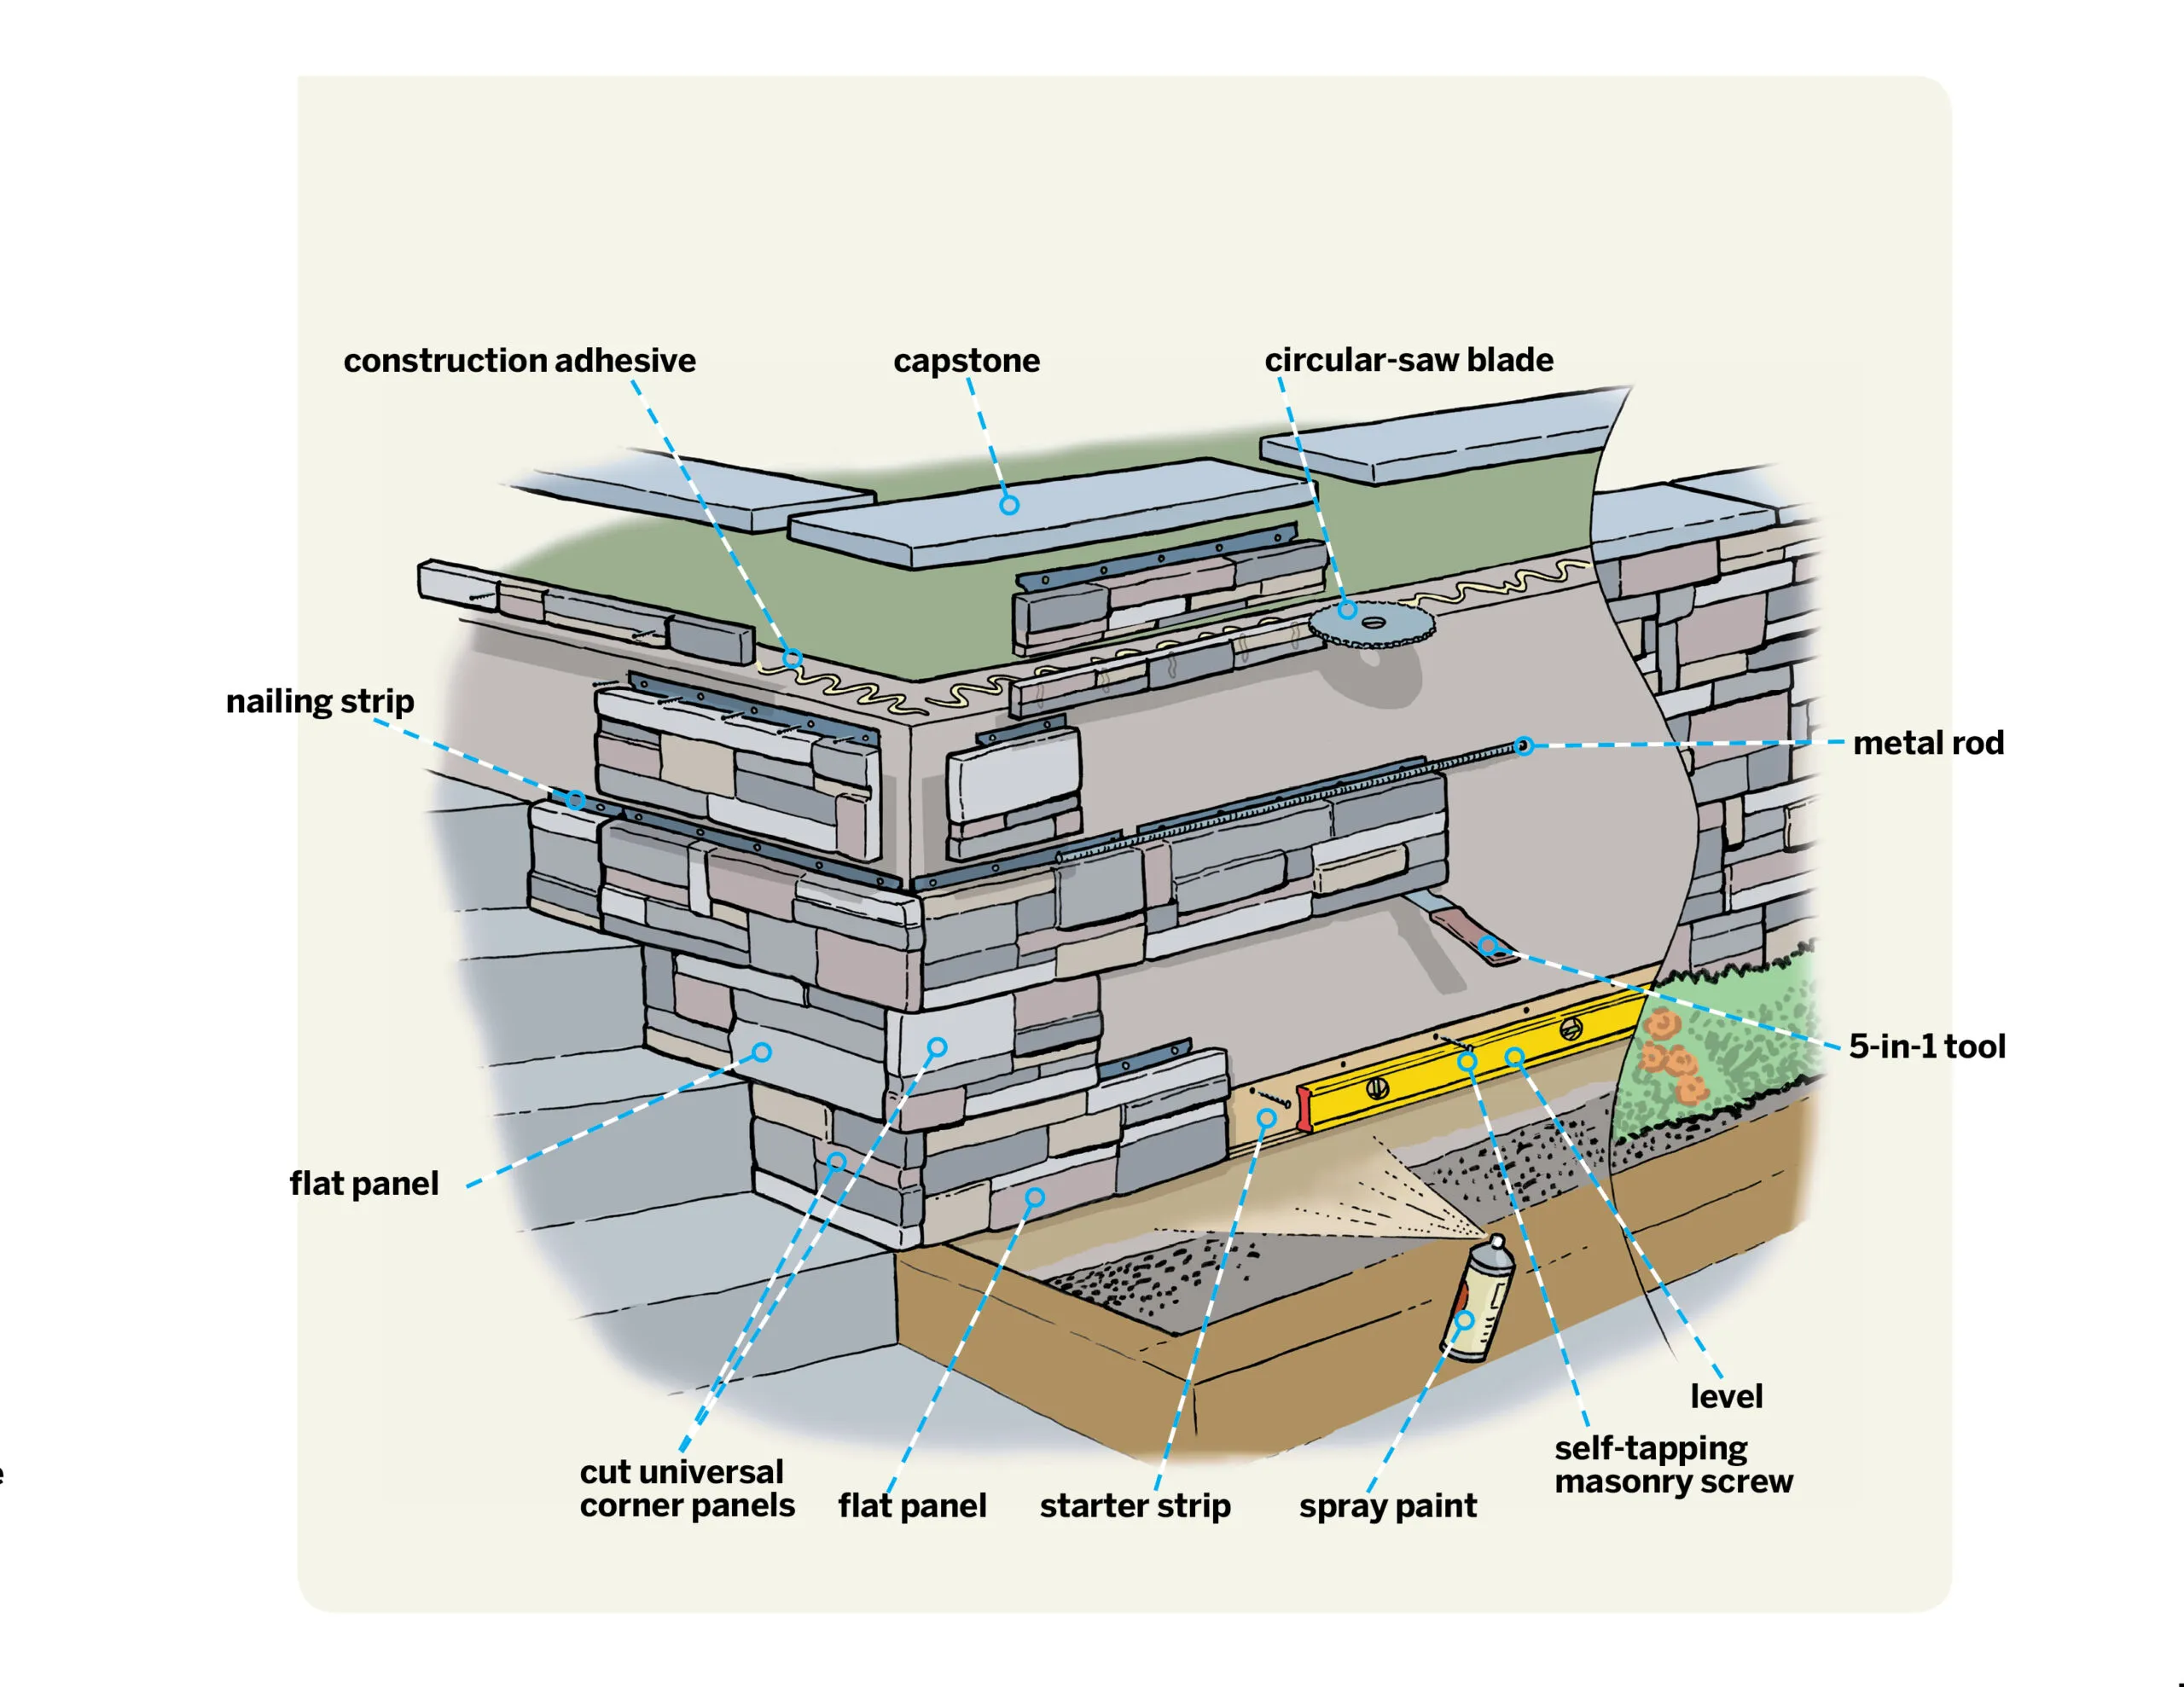
The panels must be installed above ground level, resting on a plastic support called a starter strip, so you’ll want to paint the wall below the strip to match the stone. Find a spray-paint color similar to the palette of your stone panels and paint the bottom few inches of the wall.
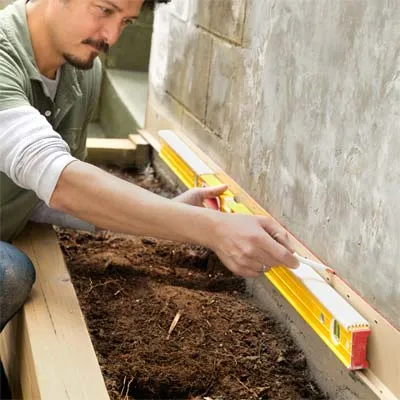
Set the location for the starter strip, at least 2 inches above any soil. Here, the strip’s lip aligns with the top of a stair on the adjacent side of the corner. Fit your drill/driver with a 3/16-inch masonry bit and drill a pilot hole through a slot in the strip near the corner and into the wall. Drive in a masonry screw to secure that end, then use the 4-foot level to bring the strip to level, and mark a line, as shown. Drill pilot holes and fasten the strip in two or three more spots, maintaining level.
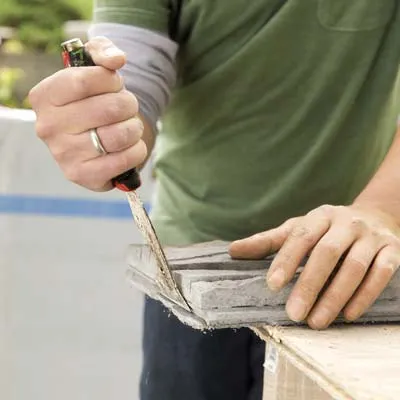
Los paneles planos tienen una pestaña en cada lado que encaja con las ranuras de los paneles planos adyacentes, pero debe retirarse de cualquier extremo que forme una esquina. Apoye el panel boca arriba sobre una superficie de trabajo y use la hoja de la herramienta 5 en 1 para quitar la pestaña, como se muestra. El borde plano resultante creará una esquina cerrada.
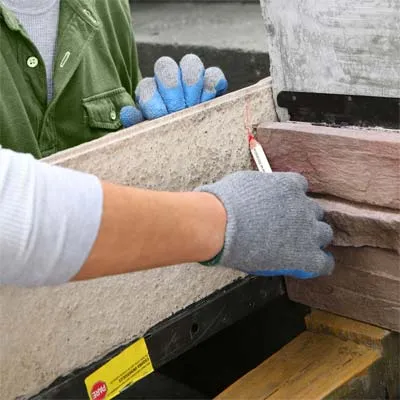
Cada tramo comienza en una esquina, con el extremo terminado de una esquina universal superponiéndose al extremo de un panel plano (sin la pestaña). Primero, la esquina universal se corta en dos partes; el borde terminado de cada pieza comienza una hilera y el borde cortado se une a un panel plano. Por motivos estéticos, corte la esquina universal para que cada pieza tenga al menos 8 pulgadas de largo. O, como en nuestro caso, córtelo para que encaje contra el contrahuella de la escalera: apoye un panel plano en el lado adyacente de la tira inicial, luego gire la esquina universal boca abajo, coloque su borde terminado contra el contrahuella de la escalera y trace una línea de corte. , como se muestra.
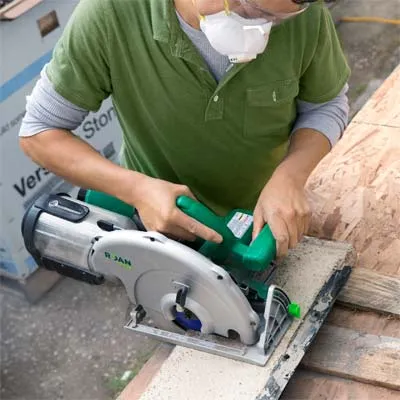
Apoye el panel marcado boca abajo sobre una superficie de trabajo con tablas de desecho debajo a cada lado de la línea de corte. Utilice una regla para marcar una línea de corte cuadrada a lo largo del punto más estrecho de la línea trazada. Coloque la sierra circular con un disco de diamante segmentado y corte a lo largo de la línea, atravesando el hormigón y la tira metálica para clavar. Asegúrese de usar gafas de seguridad, una mascarilla contra el polvo y protección auditiva.
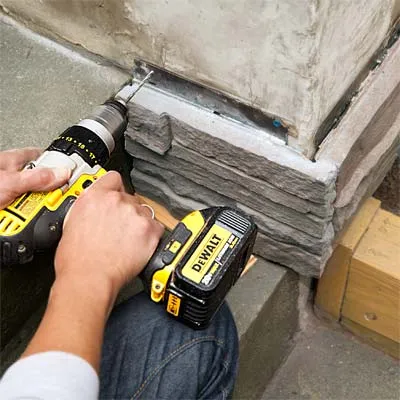
Hold the cut universal corner against the wall, bringing its finished end flush with the face of the adjacent flat panel so that the two pieces form a 90° outside corner. Level the universal corner, and drill pilot holes through the nailing strip, as shown, directly through the metal if necessary, in at least two places. Fasten the panel with 1¼-inch self-tapping masonry screws.
Consejo: Mantenga la broca girando para eliminar el polvo mientras retira el taladro del orificio piloto, permitiendo que el tornillo de mampostería golpee el concreto.
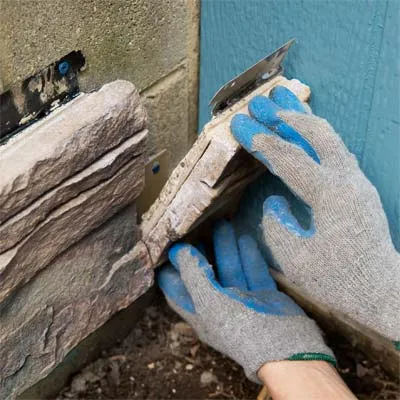
Continúe instalando paneles planos de tamaño completo a lo largo del recorrido. Cuando se acerque al final, mida y corte un panel parcial para llenar el final de la hilera. Si la pieza cortada tiene una pestaña a cada lado, use la herramienta 5 en 1 para quitarla. Coloque la pieza en su lugar, taladre agujeros guía y atorníllela a la pared.

Use the cut half of the universal corner from the first course, positioned on the opposite side of the corner to stagger the joints. Slip the tongue on its bottom edge into the groove on top of the flat panel beneath. Position a flat panel, with its tab removed, atop the universal corner in the first course. Be sure it’s cut to a different length than the piece beneath, to offset the joints across the wall. Mark and drill pilot holes for the universal corner, secure it, and install the adjacent flat panel to complete the corner.
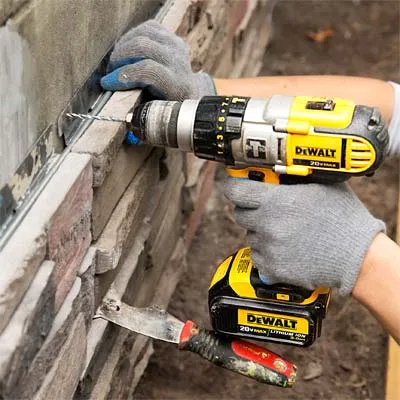
Work along the course, brushing out debris from the top groove to ensure that the panels fit together snugly. As you set each new panel, make sure that it’s aligned with the previous panel by nestling a ¼-inch metal rod in the groove along the top edge. The rod should lie flat and bridge the grooves in adjacent panels. If it doesn’t, use the 5-in-1 tool to shim the panel up, or back several screws out of the previous panel and adjust it. When the panels align, drill pilot holes and fasten them to the wall.

If the end of a panel falls in line with a joint on any of the previous courses, you’ll want to cut down its length slightly to maintain staggered joints. Hold the panel in place and mark the nailing strip at a different length. Transfer the mark to the back of the panel, cut it to size, and fasten it to the wall.
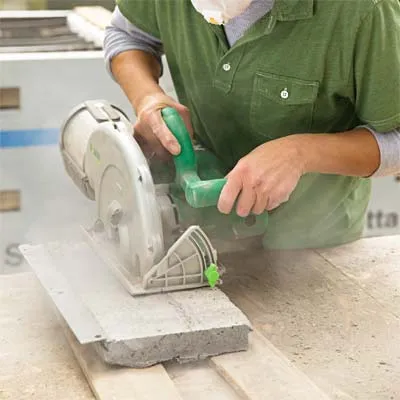
On the final course, you’ll need to cut down the height of the panels to fit, removing the nailing strip so that the stone reaches to the top of the wall. Rest a flat panel in place and scribe a cutline on the back at the height of the wall. Set the panel on a work surface, and use the circular saw to cut it to the proper height. You may want to cut your corner pieces to length first, then cut them to the proper height, as shown. Dry-fit the two pieces at the corner to check the fit.
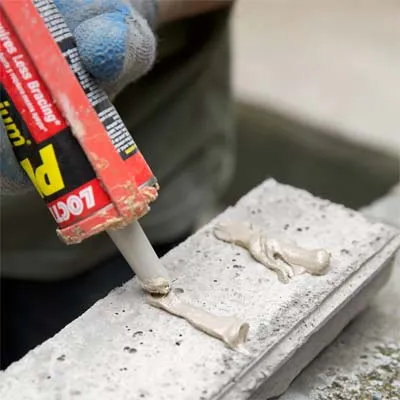
Retire los paneles de las esquinas y aplique gotas rectas de adhesivo de construcción en la parte posterior de cada pieza en tramos verticales, como se muestra, para que el agua fluya libremente detrás de los paneles y drene adecuadamente. Coloque los paneles en su lugar en la pared y ajústelos para que encajen cómodamente en la esquina.
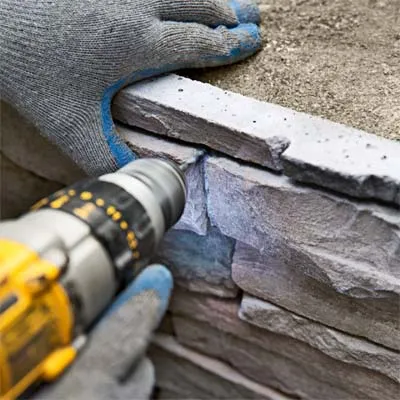
Para asegurar aún más los paneles cortados, ubique varios puntos en cada uno donde pueda insertar un sujetador discretamente en las juntas entre piedras. Sosteniendo la pieza en su lugar, taladre un orificio piloto a través del panel y en la pared. Introduzca un tornillo para mampostería, hundiendo la cabeza debajo de la superficie del panel. Cubra las cabezas de los tornillos con masilla, recoja un poco de polvo de la mesa de corte y sople sobre la masilla que se está secando para camuflarla. Puedes retocar cualquier hueco de la misma manera. Termine de instalar los paneles en la hilera final.
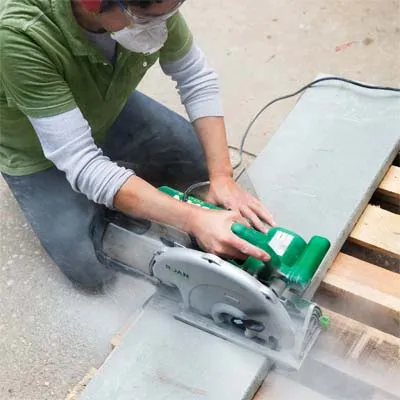
Seleccione una piedra angular varias pulgadas más ancha que la profundidad de la pared revestida para crear un saliente. Mida y marque las piedras de remate para que quepan a lo largo de la parte superior de la pared. Utilice la sierra circular y el disco de diamante segmentado para cortar a medida, como se muestra.
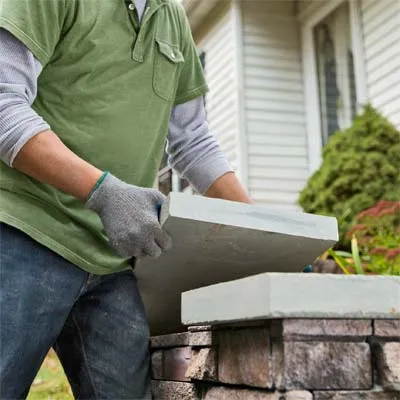
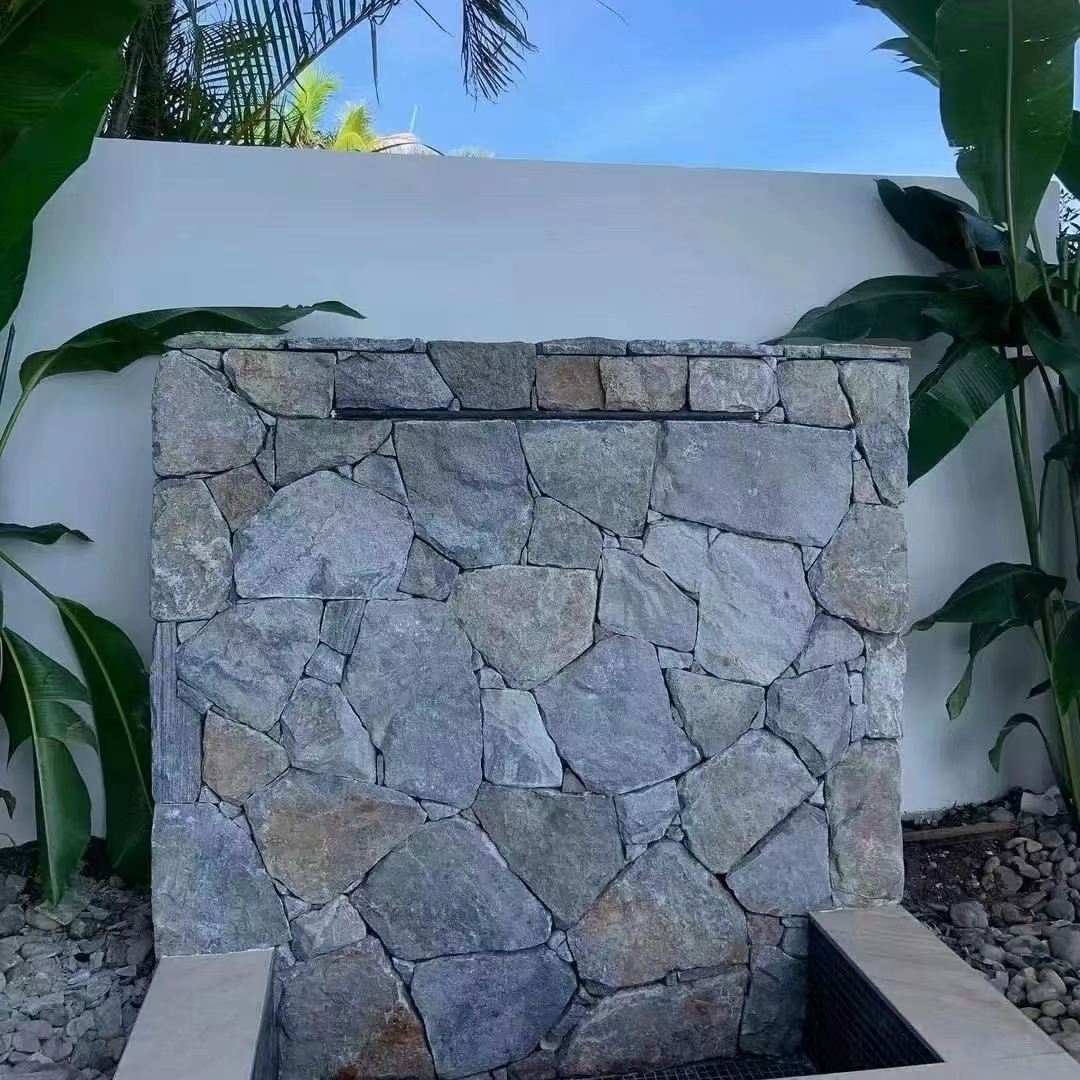
Trabajando con un compañero, levante las piedras de remate y colóquelas en seco en la parte superior de la pared. Retírelas y aplique adhesivo de construcción en la parte superior de la pared y en los bordes del revestimiento antes de volver a colocar las piedras; o, si prefiere un aspecto aún más auténtico, colóquelos sobre una base de mortero rígido. Ahora da un paso atrás y maravíllate con el aspecto perfecto.
 africano
 albanés
 amárico
 Arábica
 armenio
 azerbaiyano
 vasco
 bielorruso
 bengalí
 bosnio
 búlgaro
 catalán
 cebuano
 Porcelana
 China (Taiwán)
 corso
 croata
 checo
 danés
 Holandés
 Inglés
 esperanto
 estonio
 finlandés
 Francés
 frisio
 gallego
 georgiano
 Alemán
 Griego
 gujarati
 criollo haitiano
 hausa
 hawaiano
 hebreo
 No
 Miao
 húngaro
 islandés
 igbo
 indonesio
 irlandesa
 italiano
 japonés
 javanés
 canarés
 kazajo
 jemer
 ruandés
 coreano
 kurdo
 Kirguistán
 tuberculosis
 latín
 letón
 lituano
 luxemburgués
 macedónio
 Malgashi
 malayo
 malayalam
 maltés
 maorí
 marathi
 mongol
 Birmania
 nepalí
 noruego
 noruego
 occitano
 pastún
 persa
 Polaco
 portugués
 punjabi
 rumano
 ruso
 samoano
 gaélico escocés
 serbio
 Inglés
 Shona
 Sindhi
 cingalés
 eslovaco
 esloveno
 somalí
 Español
 sundanés
 swahili
 sueco
 tagalo
 tayiko
 Tamil
 tártaro
 telugu
 tailandés
 turco
 turcomano
 ucranio
 urdu
 uigur
 uzbeko
 vietnamita
 galés