CHRONOLOGIE:
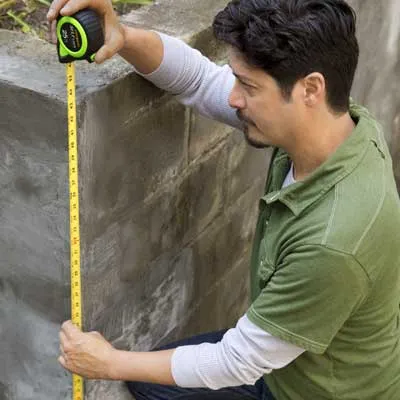
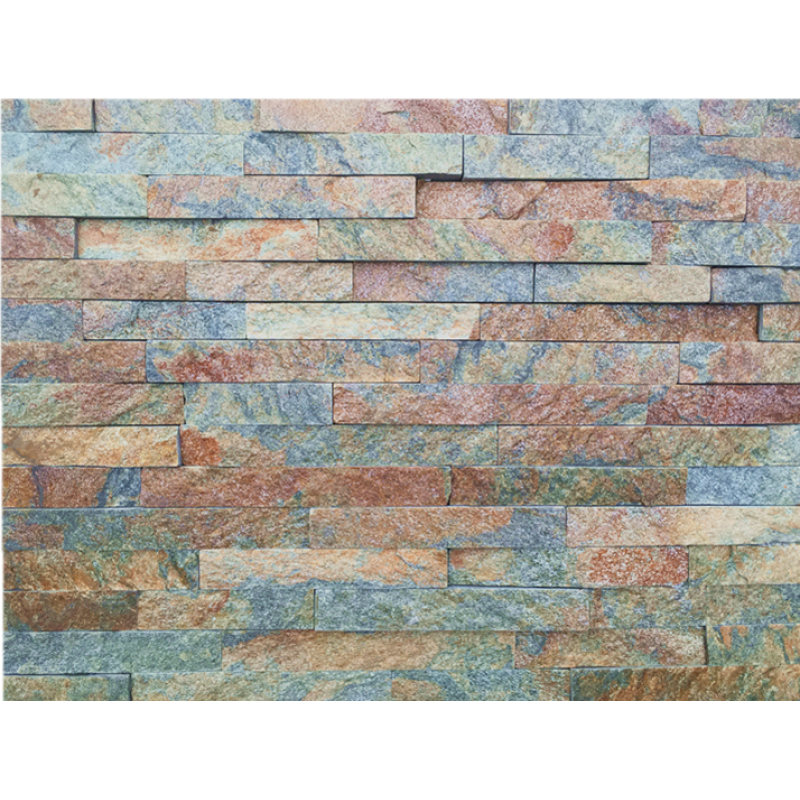
To calculate the number of universal corners to order, measure the height in inches of each outside wall corner, as shown, divide by 16, and round up to the nearest whole number. You’ll fill the area between the corners with flat panels. To calculate how many you’ll need, multiply the wall’s width by its height in feet and divide the resulting area by 2 (each panel covers 2 square feet). Subtract the number of universal corners from the result, then add 10 percent to your order of flat panels. Add one universal corner to be safe.
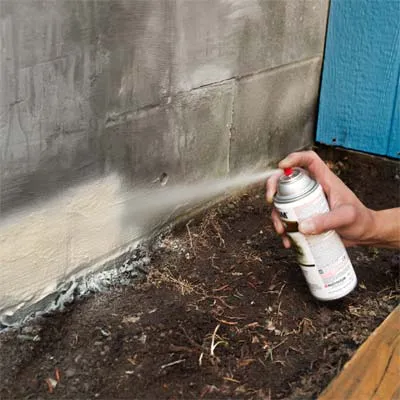
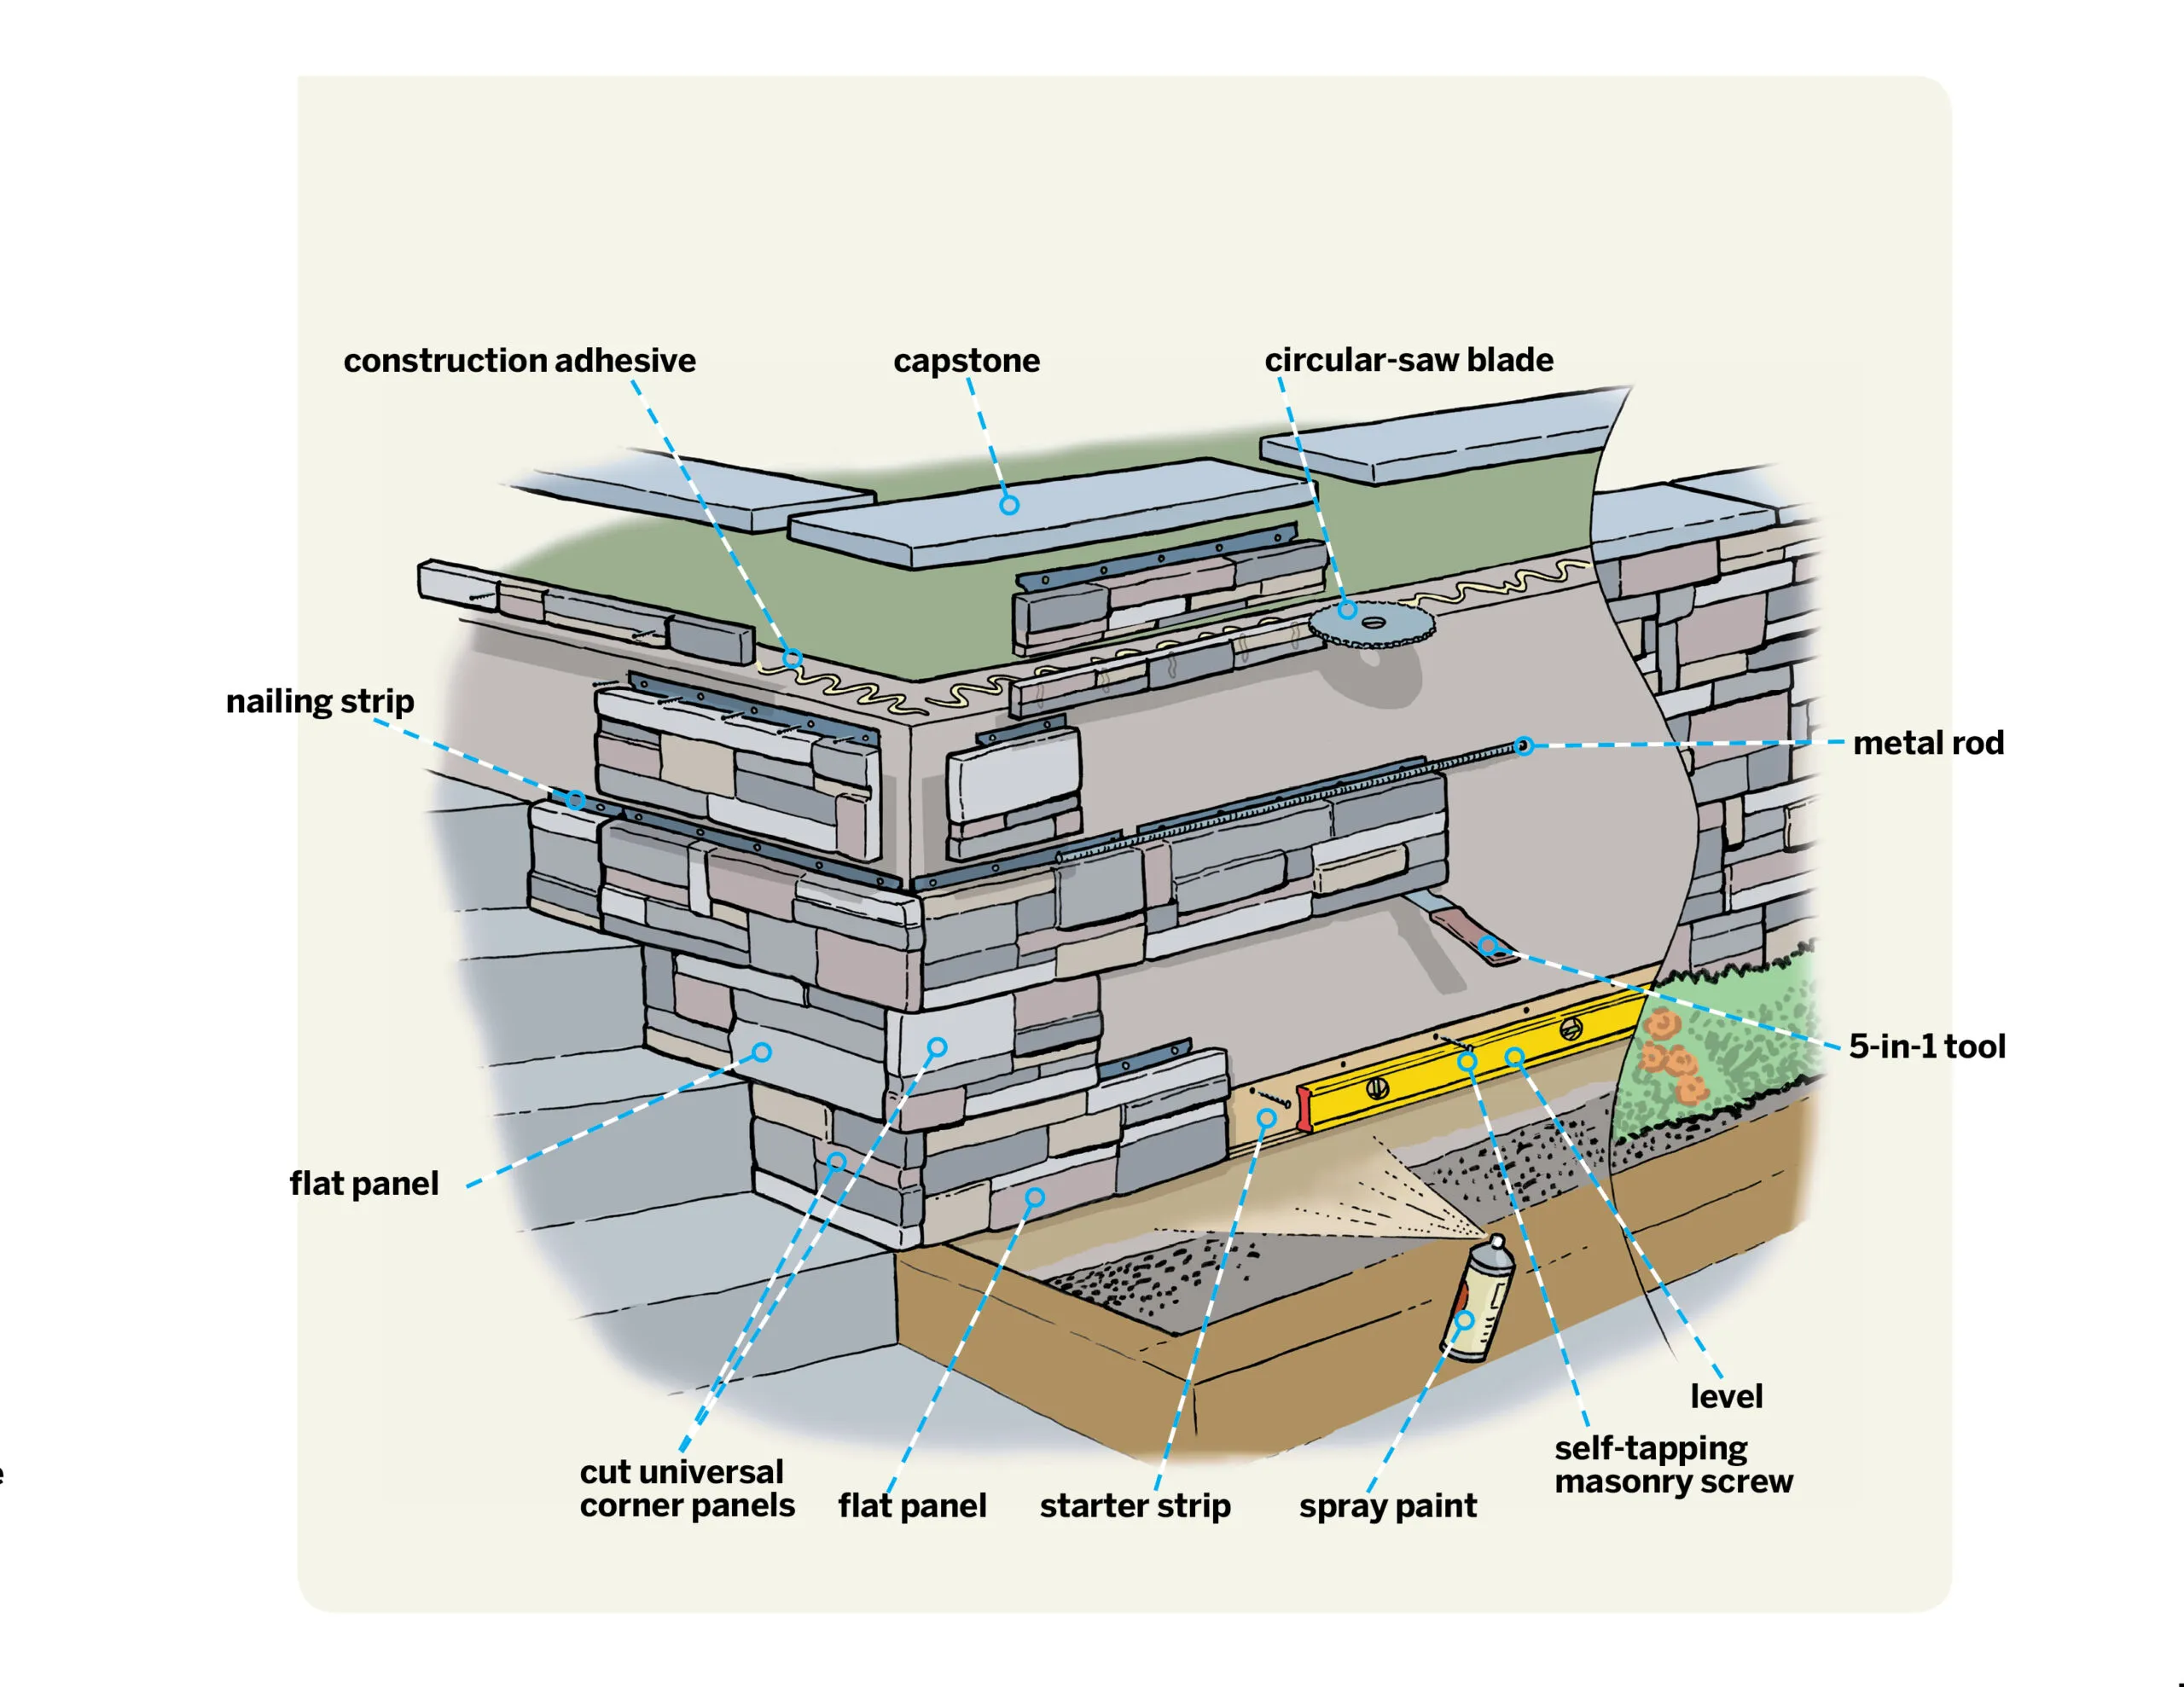
The panels must be installed above ground level, resting on a plastic support called a starter strip, so you’ll want to paint the wall below the strip to match the stone. Find a spray-paint color similar to the palette of your stone panels and paint the bottom few inches of the wall.
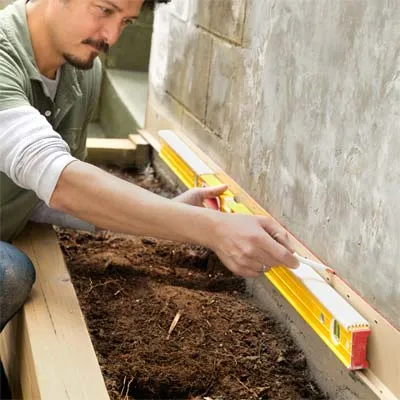
Set the location for the starter strip, at least 2 inches above any soil. Here, the strip’s lip aligns with the top of a stair on the adjacent side of the corner. Fit your drill/driver with a 3/16-inch masonry bit and drill a pilot hole through a slot in the strip near the corner and into the wall. Drive in a masonry screw to secure that end, then use the 4-foot level to bring the strip to level, and mark a line, as shown. Drill pilot holes and fasten the strip in two or three more spots, maintaining level.
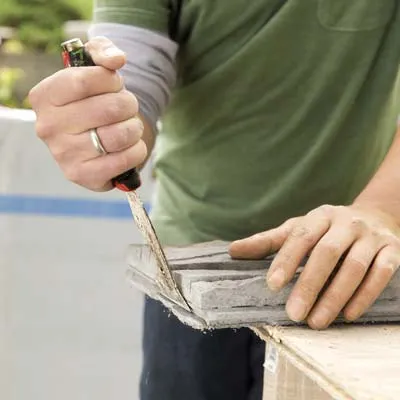
Les panneaux plats ont une languette de chaque côté qui s'engrène avec les fentes des panneaux plats adjacents, mais doit être retirée de toute extrémité formant un coin. Posez le panneau face vers le haut sur une surface de travail et utilisez la lame de l'outil 5 en 1 pour faire tomber la languette, comme indiqué. Le bord plat résultant créera un coin serré.
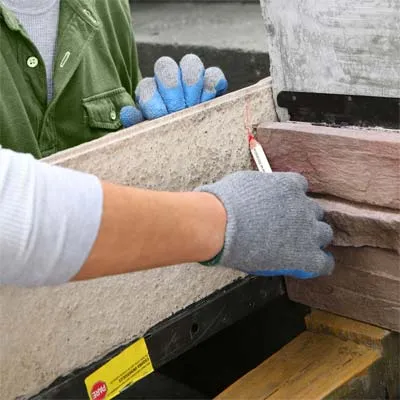
Chaque course commence à un coin, l'extrémité finie d'un coin universel chevauchant l'extrémité d'un panneau plat (avec la languette retirée). Tout d'abord, le coin universel est coupé en deux morceaux ; le bord fini de chaque pièce commence une rangée et le bord coupé aboutit à un panneau plat. Pour des raisons esthétiques, coupez le coin universel de manière à ce que chaque pièce mesure au moins 8 pouces de long. Ou, comme dans notre cas, coupez-le pour l'adapter à la contremarche : posez un panneau plat sur le côté adjacent dans la bande de départ, puis faites tourner le coin universel à l'envers, placez son bord fini contre la contremarche et tracez une ligne de coupe. , comme montré.
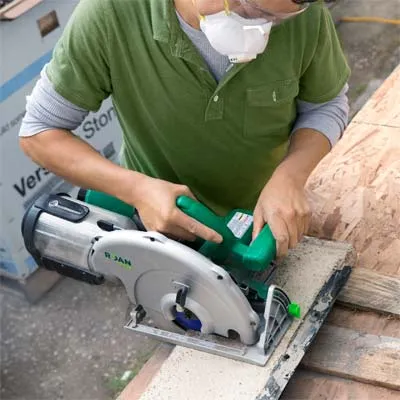
Posez le panneau marqué face vers le bas sur une surface de travail avec des planches de rebut en dessous de chaque côté de la ligne de coupe. Utilisez une règle pour marquer une ligne de coupe carrée le long du point le plus étroit de la ligne tracée. Equipez la scie circulaire d'une lame diamantée segmentée et coupez le long de la ligne en passant par le béton ainsi que la bande de clouage métallique. Assurez-vous de porter des lunettes de sécurité, un masque anti-poussière et une protection auditive.
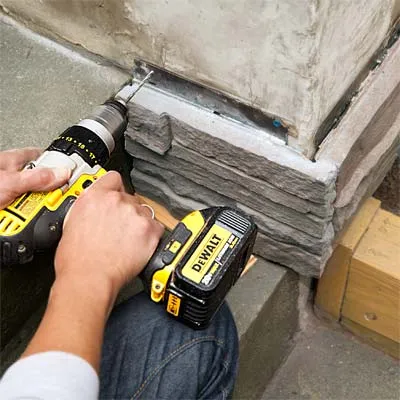
Hold the cut universal corner against the wall, bringing its finished end flush with the face of the adjacent flat panel so that the two pieces form a 90° outside corner. Level the universal corner, and drill pilot holes through the nailing strip, as shown, directly through the metal if necessary, in at least two places. Fasten the panel with 1¼-inch self-tapping masonry screws.
Conseil: Gardez votre foret en rotation pour enlever la poussière pendant que vous retirez la perceuse du trou pilote, permettant ainsi à la vis à maçonnerie de pénétrer dans le béton.
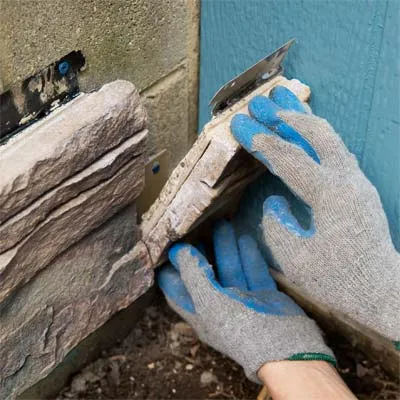
Continuez à installer des écrans plats pleine grandeur tout au long du parcours. Lorsque vous approchez de la fin, mesurez et coupez un panneau partiel pour remplir la fin du parcours. Si la pièce coupée a une languette de chaque côté, utilisez l'outil 5 en 1 pour la faire tomber. Mettez la pièce en place, percez des avant-trous et vissez-la au mur.

Use the cut half of the universal corner from the first course, positioned on the opposite side of the corner to stagger the joints. Slip the tongue on its bottom edge into the groove on top of the flat panel beneath. Position a flat panel, with its tab removed, atop the universal corner in the first course. Be sure it’s cut to a different length than the piece beneath, to offset the joints across the wall. Mark and drill pilot holes for the universal corner, secure it, and install the adjacent flat panel to complete the corner.
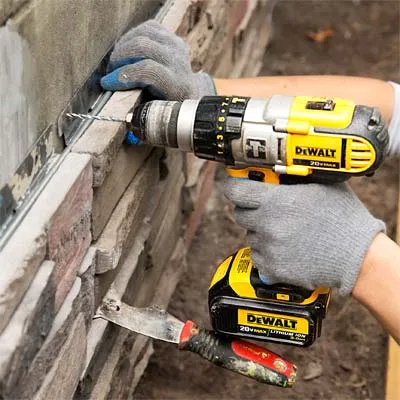
Work along the course, brushing out debris from the top groove to ensure that the panels fit together snugly. As you set each new panel, make sure that it’s aligned with the previous panel by nestling a ¼-inch metal rod in the groove along the top edge. The rod should lie flat and bridge the grooves in adjacent panels. If it doesn’t, use the 5-in-1 tool to shim the panel up, or back several screws out of the previous panel and adjust it. When the panels align, drill pilot holes and fasten them to the wall.

If the end of a panel falls in line with a joint on any of the previous courses, you’ll want to cut down its length slightly to maintain staggered joints. Hold the panel in place and mark the nailing strip at a different length. Transfer the mark to the back of the panel, cut it to size, and fasten it to the wall.
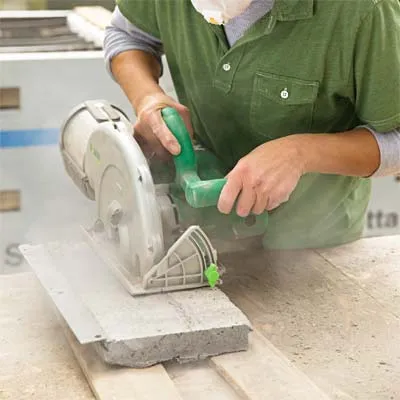
On the final course, you’ll need to cut down the height of the panels to fit, removing the nailing strip so that the stone reaches to the top of the wall. Rest a flat panel in place and scribe a cutline on the back at the height of the wall. Set the panel on a work surface, and use the circular saw to cut it to the proper height. You may want to cut your corner pieces to length first, then cut them to the proper height, as shown. Dry-fit the two pieces at the corner to check the fit.
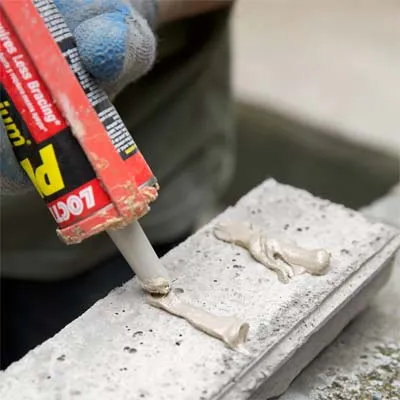
Retirez les panneaux d'angle et appliquez des cordons droits d'adhésif de construction au dos de chaque pièce en courses verticales, comme illustré, afin que l'eau puisse s'écouler librement derrière les panneaux et s'écouler correctement. Placez les panneaux en place sur le mur et ajustez-les pour qu'ils s'adaptent parfaitement au coin.
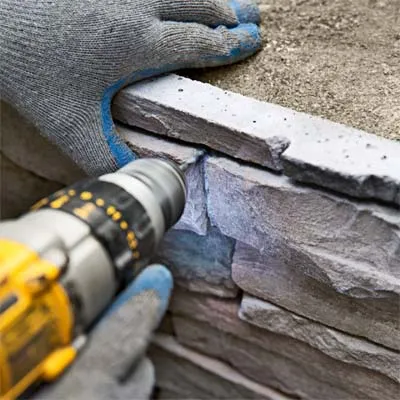
Pour sécuriser davantage les panneaux découpés, localisez plusieurs endroits sur chacun d'entre eux où vous pourrez enfoncer discrètement une attache dans les joints entre les pierres. En maintenant la pièce en place, percez un trou pilote à travers le panneau et dans le mur. Enfoncez une vis à maçonnerie en enfonçant la tête sous la surface du panneau. Couvrez les têtes de vis avec du mastic, récupérez un peu de poussière sur la table de découpe et soufflez-la sur le mastic séchant pour le camoufler. Vous pouvez retoucher les éventuelles lacunes de la même manière. Terminez l'installation des panneaux dans la couche finale.
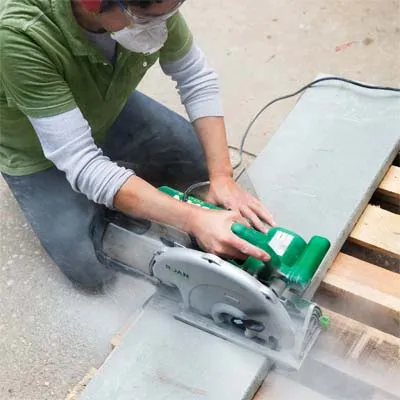
Sélectionnez une pierre de finition plusieurs pouces plus large que la profondeur de votre mur revêtu pour créer un surplomb. Mesurez et marquez les pierres de finition pour qu'elles s'adaptent au haut du mur. Utilisez la scie circulaire et la lame diamantée segmentée pour couper à longueur, comme illustré.
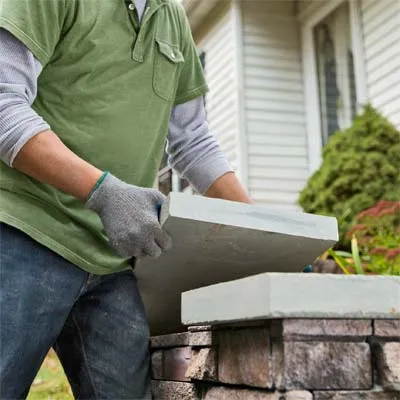
En collaboration avec un partenaire, soulevez les pierres de finition et fixez-les à sec sur le mur. Retirez-les et appliquez de la colle de construction sur le dessus du mur et sur les bords du placage avant de remettre les pierres en place ; ou, si vous préférez un look encore plus authentique, placez-les dans un lit de mortier rigide. Maintenant, prenez du recul et émerveillez-vous devant le look sans couture.
 africain
 albanais
 Amharique
 arabe
 arménien
 azerbaïdjanais
 Basque
 biélorusse
 bengali
 bosniaque
 bulgare
 catalan
 Cebuano
 Chine
 Chine (Taïwan)
 Corse
 croate
 tchèque
 danois
 Néerlandais
 Anglais
 espéranto
 estonien
 finlandais
 Français
 frison
 Galicien
 géorgien
 Allemand
 grec
 Gujarati
 Créole haïtien
 haoussa
 hawaïen
 hébreu
 Non
 Miao
 hongrois
 islandais
 igbo
 indonésien
 irlandais
 italien
 Japonais
 Javanais
 Kannada
 kazakh
 Khmer
 Rwandais
 coréen
 kurde
 Kirghize
 tuberculose
 Latin
 letton
 lituanien
 luxembourgeois
 Macédonien
 Malgashi
 malais
 Malayalam
 maltais
 Maori
 Marathi
 mongol
 Birmanie
 Népalais
 norvégien
 norvégien
 Occitan
 pachtou
 persan
 polonais
 Portugais
 Pendjabi
 roumain
 russe
 Samoan
 Gaélique écossais
 serbe
 Anglais
 Shona
 Sindhi
 Cinghalais
 slovaque
 slovène
 somali
 Espagnol
 Soundanais
 Swahili
 suédois
 Tagalog
 tadjik
 Tamil
 tatar
 Télougou
 thaïlandais
 turc
 Turkmènes
 ukrainien
 Ourdou
 Ouïghour
 Ouzbek
 vietnamien
 gallois