ٹائم لائن:
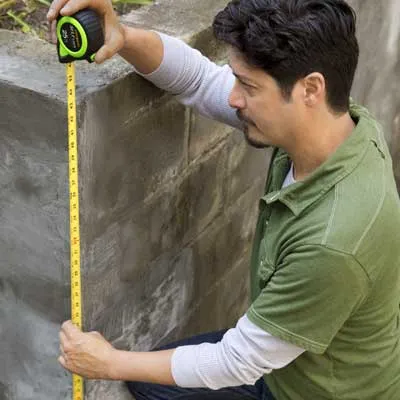
To calculate the number of universal corners to order, measure the height in inches of each outside wall corner, as shown, divide by 16, and round up to the nearest whole number. You’ll fill the area between the corners with flat panels. To calculate how many you’ll need, multiply the wall’s width by its height in feet and divide the resulting area by 2 (each panel covers 2 square feet). Subtract the number of universal corners from the result, then add 10 percent to your order of flat panels. Add one universal corner to be safe.
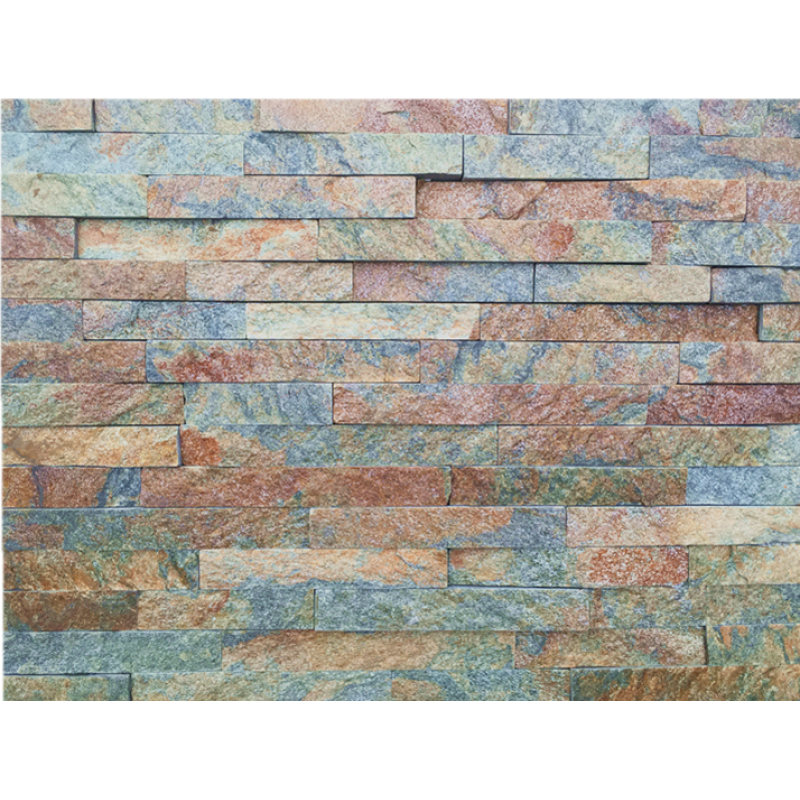
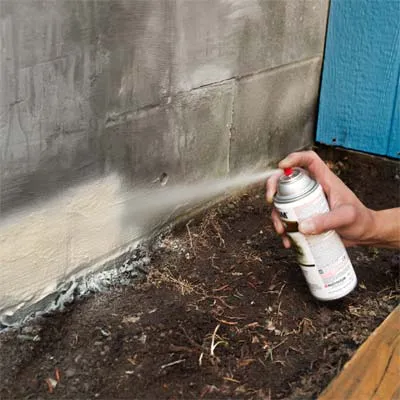
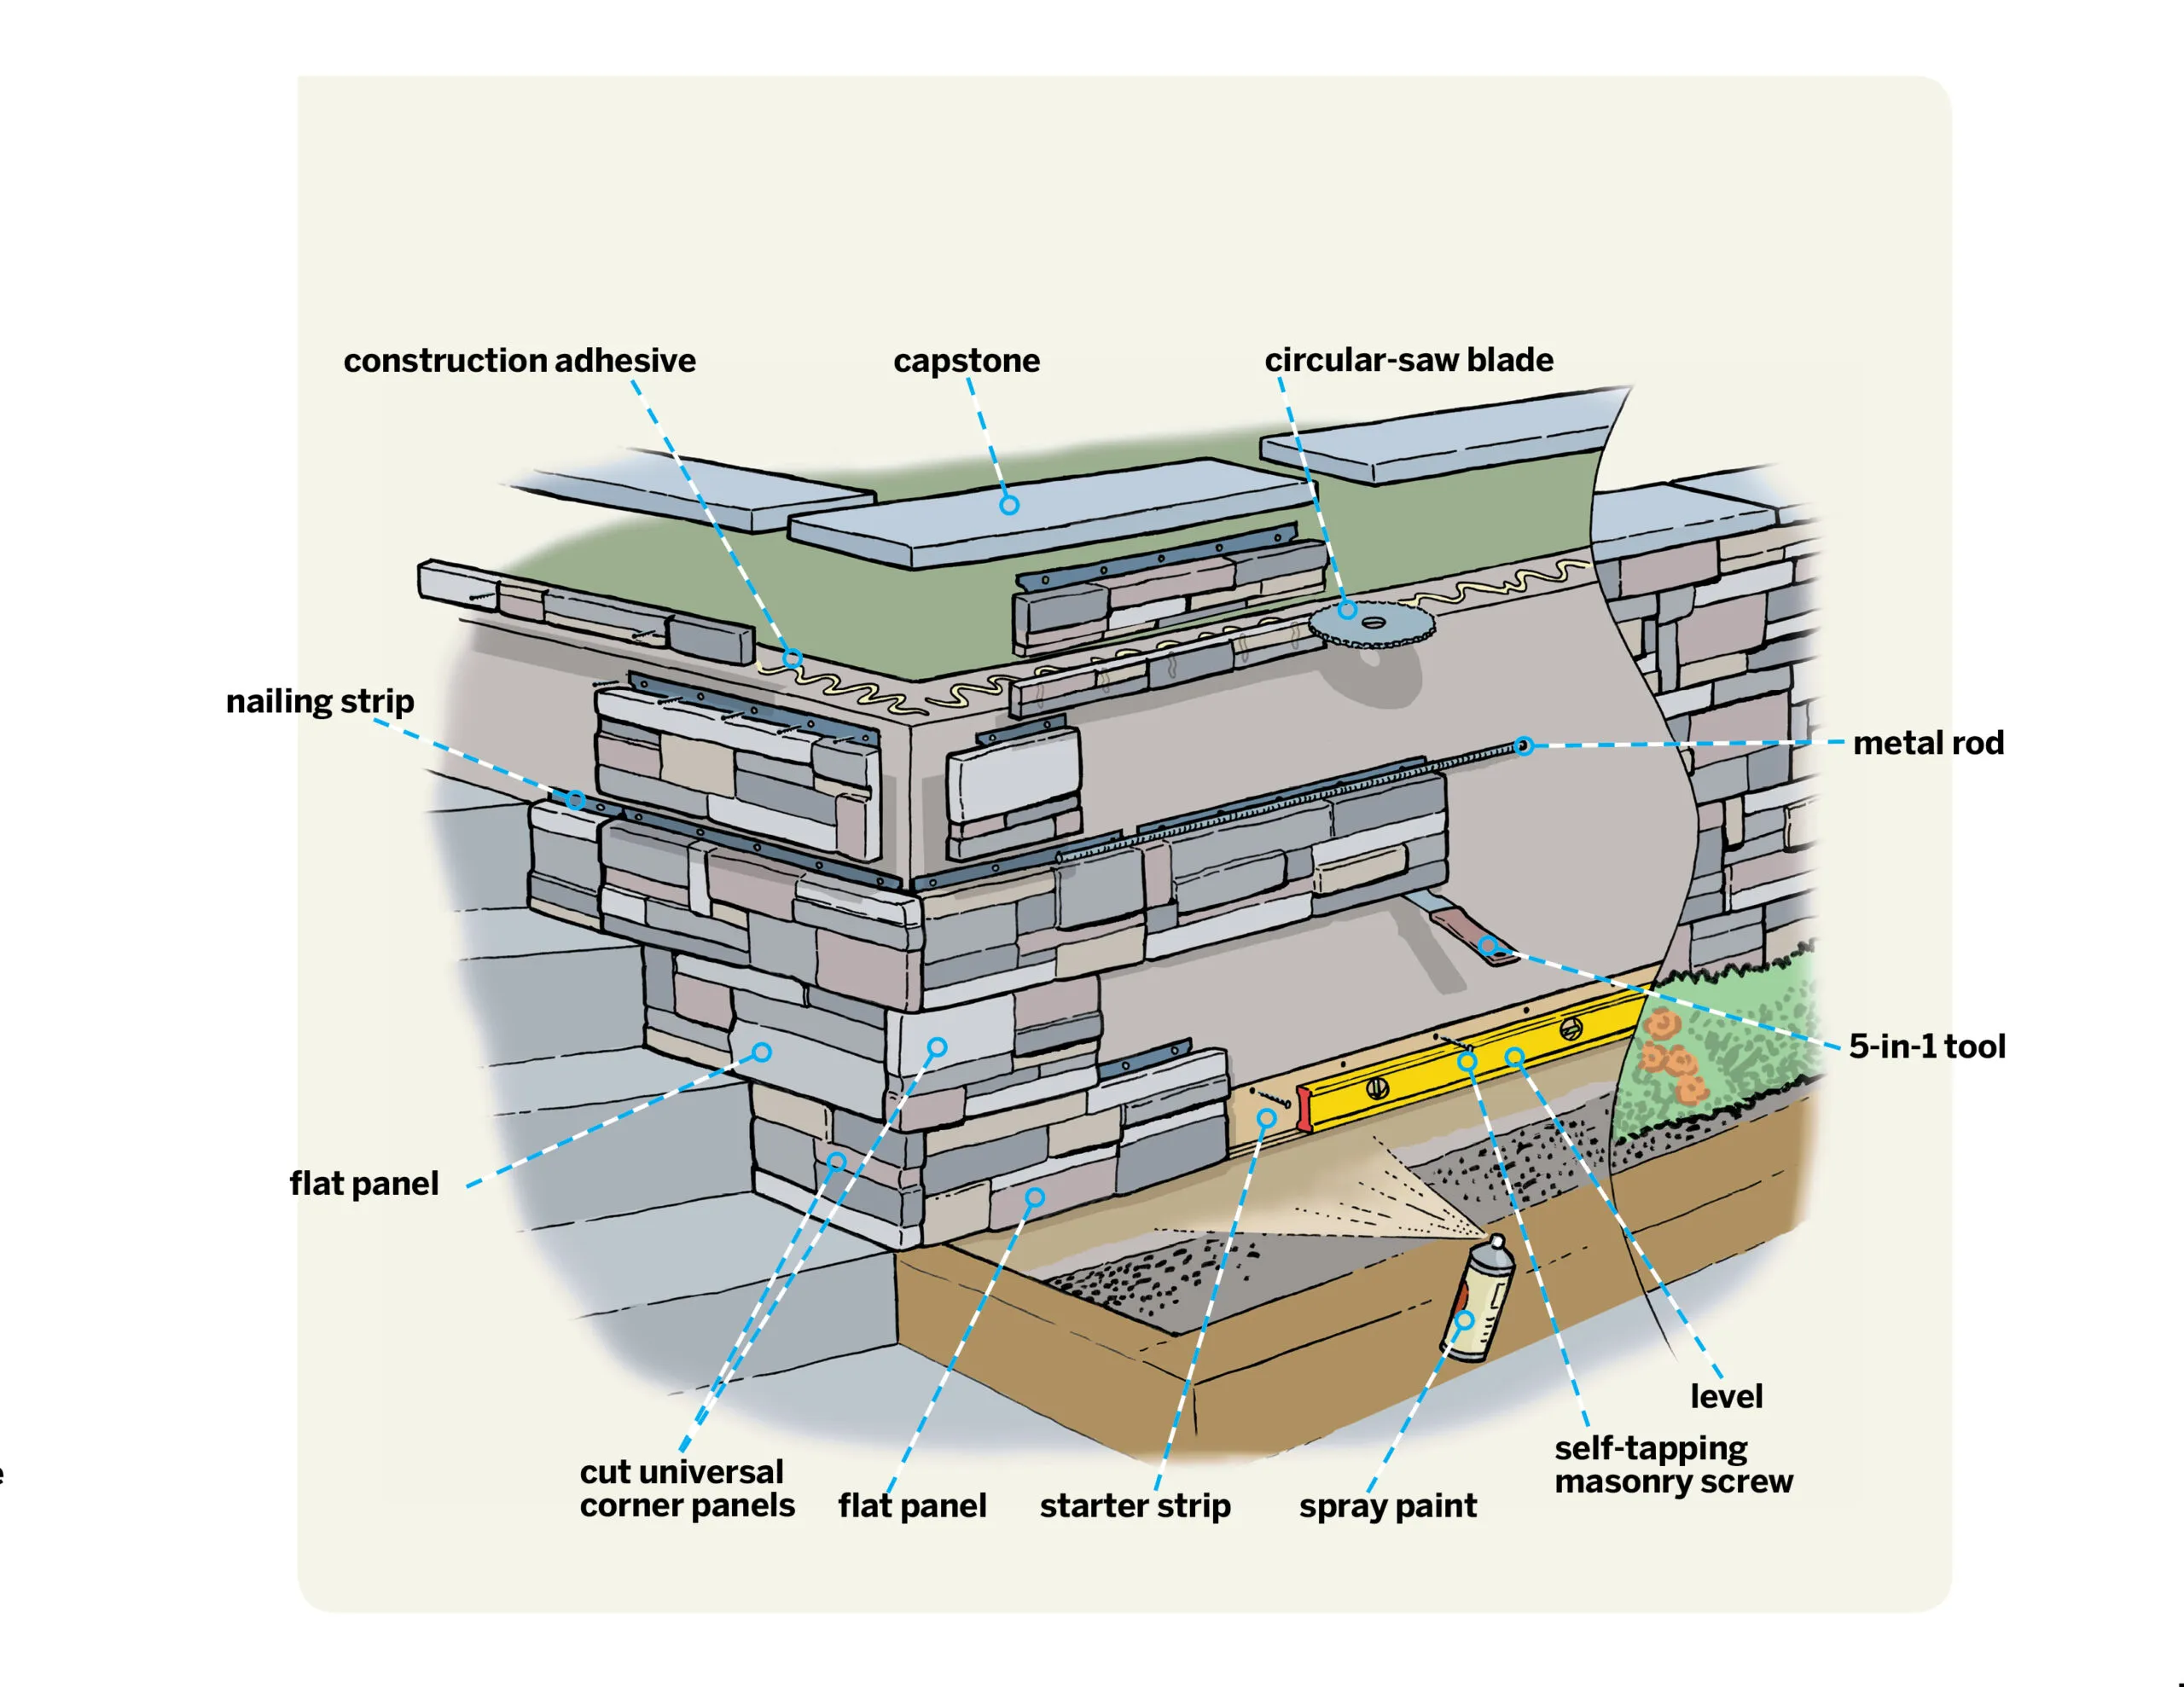
The panels must be installed above ground level, resting on a plastic support called a starter strip, so you’ll want to paint the wall below the strip to match the stone. Find a spray-paint color similar to the palette of your stone panels and paint the bottom few inches of the wall.
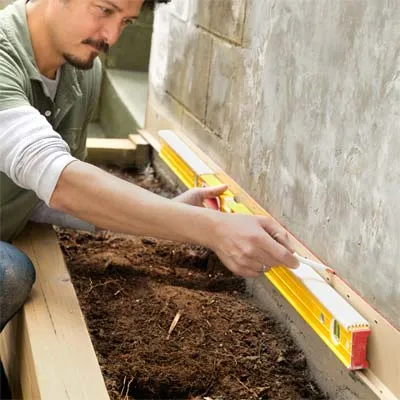
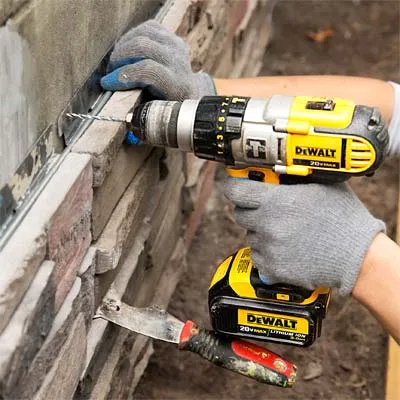
Set the location for the starter strip, at least 2 inches above any soil. Here, the strip’s lip aligns with the top of a stair on the adjacent side of the corner. Fit your drill/driver with a 3/16-inch masonry bit and drill a pilot hole through a slot in the strip near the corner and into the wall. Drive in a masonry screw to secure that end, then use the 4-foot level to bring the strip to level, and mark a line, as shown. Drill pilot holes and fasten the strip in two or three more spots, maintaining level.
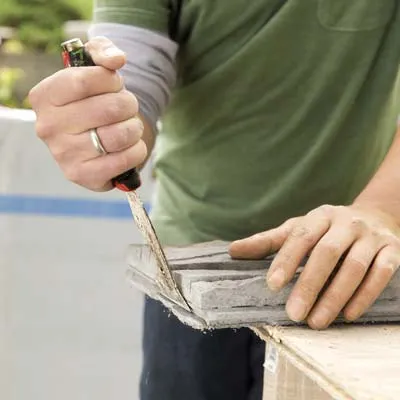
فلیٹ پینلز میں ہر طرف ایک ٹیب ہوتا ہے جو ملحقہ فلیٹ پینلز پر سلاٹوں کے ساتھ میش کرتا ہے لیکن اسے کسی بھی سرے سے ہٹانے کی ضرورت ہوتی ہے جو کونے کی شکل دیتا ہے۔ پینل فیس اپ کو کام کی سطح پر آرام کریں اور ٹیب کو بند کرنے کے لیے 5-in-1 ٹول کے بلیڈ کا استعمال کریں، جیسا کہ دکھایا گیا ہے۔ نتیجے میں فلیٹ کنارے ایک تنگ کونے کے لئے بنائے گا.
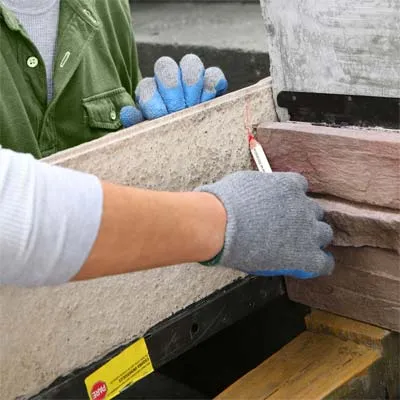
ہر رن ایک کونے سے شروع ہوتا ہے، جس میں ایک عالمگیر کونے کا اختتام ایک فلیٹ پینل کے اختتام پر ہوتا ہے (ٹیب کو ہٹا کر)۔ سب سے پہلے، عالمگیر کونے کو دو ٹکڑوں میں کاٹا جاتا ہے۔ ہر ٹکڑے کا تیار کنارہ ایک کورس شروع کرتا ہے، اور کٹے ہوئے کنارے ایک فلیٹ پینل میں بٹ جاتے ہیں۔ جمالیات کے لیے، عالمگیر کونے کو کاٹیں تاکہ ہر ٹکڑا کم از کم 8 انچ لمبا ہو۔ یا، جیسا کہ ہمارے معاملے میں ہے، اسے سیڑھی کے چڑھنے والے کے خلاف فٹ کرنے کے لیے کاٹ دیں: اسٹارٹر کی پٹی میں ملحقہ طرف ایک فلیٹ پینل کو آرام دیں، پھر عالمگیر کونے کو الٹا گھمائیں، اس کے ختم ہوئے کنارے کو سیڑھی کے چڑھنے والے کے خلاف بٹائیں، اور کٹ لائن لکھیں۔ ، جیسے دکھایا گیا ہے.
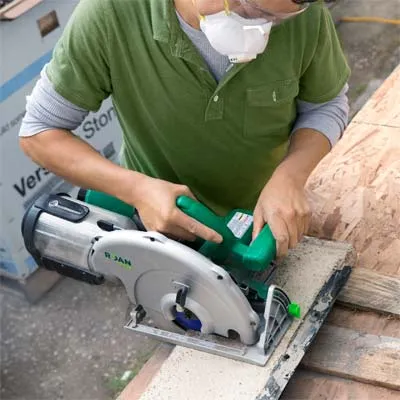
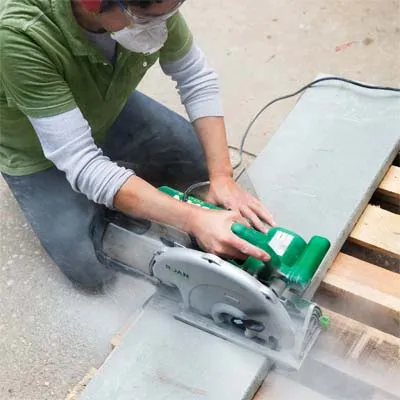
کٹ لائن کے دونوں طرف اس کے نیچے سکریپ بورڈز کے ساتھ کام کی سطح پر نشان زدہ پینل کا چہرہ نیچے رکھیں۔ لکھی ہوئی لکیر کے تنگ ترین نقطے کے ساتھ مربع کٹ لائن کو نشان زد کرنے کے لیے سیدھے کنارے کا استعمال کریں۔ سرکلر آری کو سیگمنٹڈ ڈائمنڈ بلیڈ کے ساتھ فٹ کریں اور کنکریٹ کے ساتھ ساتھ دھاتی کیلوں کی پٹی سے گزرتے ہوئے لائن کے ساتھ کاٹ دیں۔ حفاظتی شیشے، دھول کا ماسک، اور سماعت سے تحفظ ضرور پہنیں۔
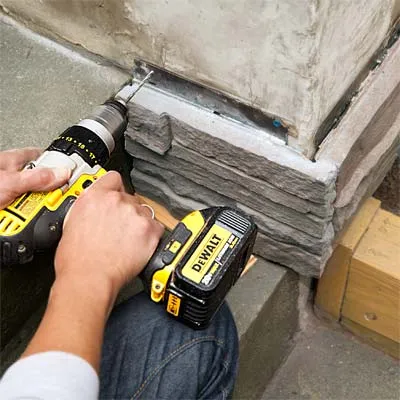
Hold the cut universal corner against the wall, bringing its finished end flush with the face of the adjacent flat panel so that the two pieces form a 90° outside corner. Level the universal corner, and drill pilot holes through the nailing strip, as shown, directly through the metal if necessary, in at least two places. Fasten the panel with 1¼-inch self-tapping masonry screws.
ٹپ: جب آپ پائلٹ ہول سے ڈرل کو پیچھے ہٹاتے ہیں تو دھول کو ہٹانے کے لیے اپنے بٹ کو گھماتے رہیں، جس سے چنائی کے اسکرو کو کنکریٹ میں ٹیپ ہو سکے۔
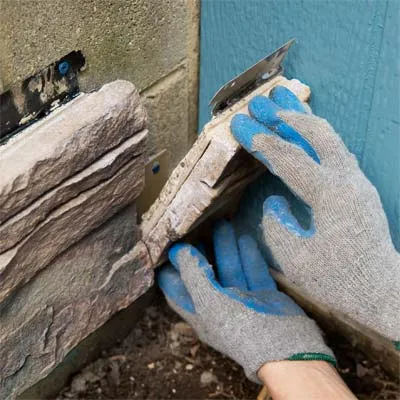
پورے سائز کے فلیٹ پینلز کو انسٹال کرنا جاری رکھیں، کورس کے نیچے کام کرتے ہوئے۔ جب آپ اختتام کے قریب پہنچیں، تو کورس کے اختتام کو پُر کرنے کے لیے جزوی پینل کی پیمائش کریں اور کاٹ دیں۔ اگر کٹے ہوئے ٹکڑے کے دونوں طرف ٹیب ہے تو اسے بند کرنے کے لیے 5-in-1 ٹول کا استعمال کریں۔ ٹکڑے کو جگہ پر فٹ کریں، پائلٹ سوراخوں کو ڈرل کریں، اور اسے دیوار سے کھینچیں۔

Use the cut half of the universal corner from the first course, positioned on the opposite side of the corner to stagger the joints. Slip the tongue on its bottom edge into the groove on top of the flat panel beneath. Position a flat panel, with its tab removed, atop the universal corner in the first course. Be sure it’s cut to a different length than the piece beneath, to offset the joints across the wall. Mark and drill pilot holes for the universal corner, secure it, and install the adjacent flat panel to complete the corner.
Work along the course, brushing out debris from the top groove to ensure that the panels fit together snugly. As you set each new panel, make sure that it’s aligned with the previous panel by nestling a ¼-inch metal rod in the groove along the top edge. The rod should lie flat and bridge the grooves in adjacent panels. If it doesn’t, use the 5-in-1 tool to shim the panel up, or back several screws out of the previous panel and adjust it. When the panels align, drill pilot holes and fasten them to the wall.

If the end of a panel falls in line with a joint on any of the previous courses, you’ll want to cut down its length slightly to maintain staggered joints. Hold the panel in place and mark the nailing strip at a different length. Transfer the mark to the back of the panel, cut it to size, and fasten it to the wall.
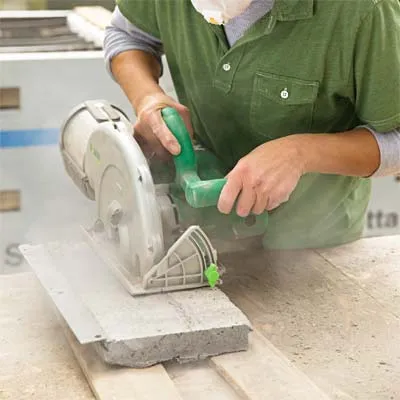
On the final course, you’ll need to cut down the height of the panels to fit, removing the nailing strip so that the stone reaches to the top of the wall. Rest a flat panel in place and scribe a cutline on the back at the height of the wall. Set the panel on a work surface, and use the circular saw to cut it to the proper height. You may want to cut your corner pieces to length first, then cut them to the proper height, as shown. Dry-fit the two pieces at the corner to check the fit.
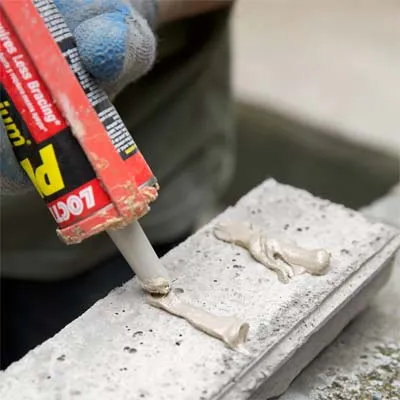
کونے کے پینلز کو ہٹا دیں اور عمودی رنوں میں ہر ٹکڑے کی پشت پر تعمیراتی چپکنے والی سیدھی موتیوں کو لگائیں، جیسا کہ دکھایا گیا ہے، تاکہ پانی پینل کے پیچھے بہنے اور مناسب طریقے سے نکلنے کے لیے آزاد رہے۔ پینلز کو دیوار پر جگہ پر سیٹ کریں اور انہیں کونے میں آرام سے فٹ ہونے کے لیے ایڈجسٹ کریں۔
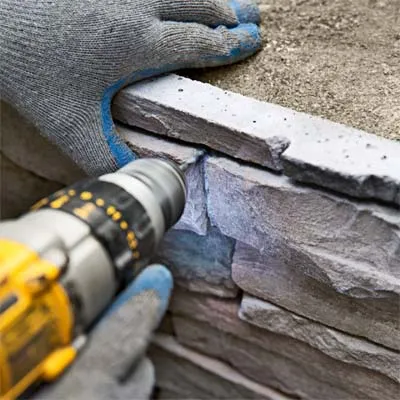
کٹ ڈاؤن پینلز کو مزید محفوظ بنانے کے لیے، ہر ایک پر کئی جگہیں تلاش کریں جہاں آپ پتھروں کے درمیان جوڑوں میں فاسٹنر کو غیر واضح طور پر ڈوب سکتے ہیں۔ ٹکڑے کو جگہ پر رکھتے ہوئے، پینل کے ذریعے اور دیوار میں ایک پائلٹ سوراخ ڈرل کریں۔ پینل کی سطح کے نیچے سر کو ڈوبتے ہوئے، چنائی کے اسکرو میں چلائیں۔ اسکریو ہیڈز کو کُلک سے ڈھانپیں، کٹنگ ٹیبل سے کچھ دھول اکھٹی کریں، اور اسے چھلنی کرنے کے لیے اسے خشک ہونے والی کُولک پر اڑا دیں۔ آپ اسی طرح کسی بھی خلا کو چھو سکتے ہیں۔ آخری کورس میں پینلز کو انسٹال کرنا مکمل کریں۔
اوور ہینگ بنانے کے لیے اپنی پوش دیوار کی گہرائی سے کئی انچ چوڑا کیپ اسٹون منتخب کریں۔ دیوار کے اوپری حصے میں فٹ ہونے کے لیے کیپ اسٹون کی پیمائش اور نشان لگائیں۔ جیسا کہ دکھایا گیا ہے لمبائی میں کاٹنے کے لیے سرکلر آری اور سیگمنٹڈ ڈائمنڈ بلیڈ کا استعمال کریں۔

پارٹنر کے ساتھ کام کرتے ہوئے، کیپ اسٹونز کو اٹھائیں اور انہیں دیوار کے اوپر خشک کریں۔ انہیں ہٹائیں اور پتھروں کو دوبارہ ترتیب دینے سے پہلے دیوار کے اوپری حصے اور پوشاک کے کناروں پر تعمیراتی چپکنے والی چیز لگائیں۔ یا، اگر آپ اس سے بھی زیادہ مستند شکل کو ترجیح دیتے ہیں، تو انہیں ایک سخت مارٹر بیڈ میں سیٹ کریں۔ اب ایک قدم پیچھے ہٹیں اور ہموار نظر پر حیران ہوں۔
 افریقی
 البانوی
 امہاری
 عربی
 آرمینیائی
 آذربائیجانی
 باسکی
 بیلاروسی
 بنگالی
 بوسنیائی
 بلغاریائی
 کاتالان
 سیبوانو
 چین
 چین (تائیوان)
 کورسیکن
 کروشین
 چیک
 ڈینش
 ڈچ
 انگریزی
 ایسپرانٹو
 اسٹونین
 فنش
 فرانسیسی
 فریسیئن
 گالیشین
 جارجیائی
 جرمن
 یونانی
 گجراتی
 ہیٹی کریول
 ہاؤسا
 ہوائی
 عبرانی
 nope کیا
 میاؤ
 ہنگری
 آئس لینڈی
 igbo
 انڈونیشین
 آئرش
 اطالوی
 جاپانی
 جاوانی
 کنڑ
 قازق
 خمیر
 روانڈا
 کورین
 کرد
 کرغیز
 ٹی بی
 لاطینی
 لیٹوین
 لتھوینیائی
 لکسمبرگش
 مقدونیائی
 مالگاشی
 مالائی
 ملیالم
 مالٹیز
 ماوری
 مراٹھی
 منگول
 میانمار
 نیپالی
 ناروے
 ناروے
 آکسیٹن
 پشتو
 فارسی
 پولش
 پرتگالی
 پنجابی
 رومانیہ
 روسی
 سامون
 سکاٹش گیلک
 سربیائی
 انگریزی
 شونا
 سندھی
 سنہالا
 سلوواک
 سلووینیائی
 صومالی
 ہسپانوی
 سنڈانی
 سواحلی
 سویڈش
 ٹیگالوگ
 تاجک
 تامل
 تاتار
 تیلگو
 تھائی
 ترکی
 ترکمان
 یوکرینی
 اردو
 ایغور
 ازبک
 ویتنامی
 ویلش