TIJDLIJN:
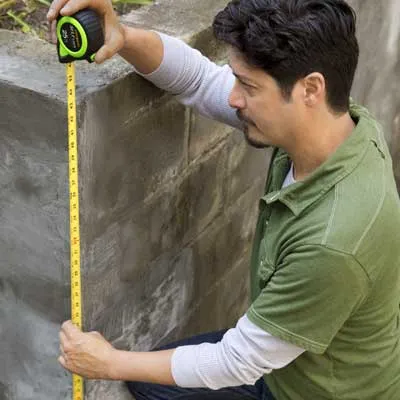
To calculate the number of universal corners to order, measure the height in inches of each outside wall corner, as shown, divide by 16, and round up to the nearest whole number. You’ll fill the area between the corners with flat panels. To calculate how many you’ll need, multiply the wall’s width by its height in feet and divide the resulting area by 2 (each panel covers 2 square feet). Subtract the number of universal corners from the result, then add 10 percent to your order of flat panels. Add one universal corner to be safe.
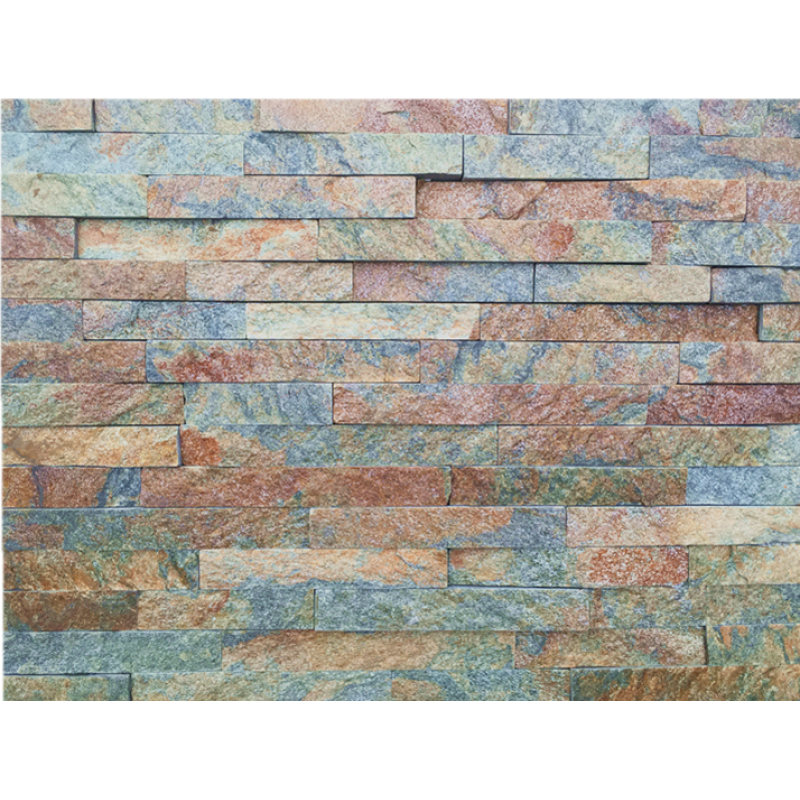
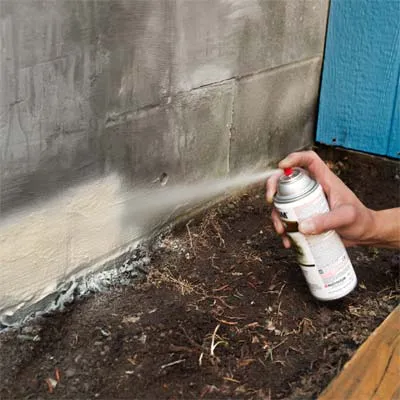
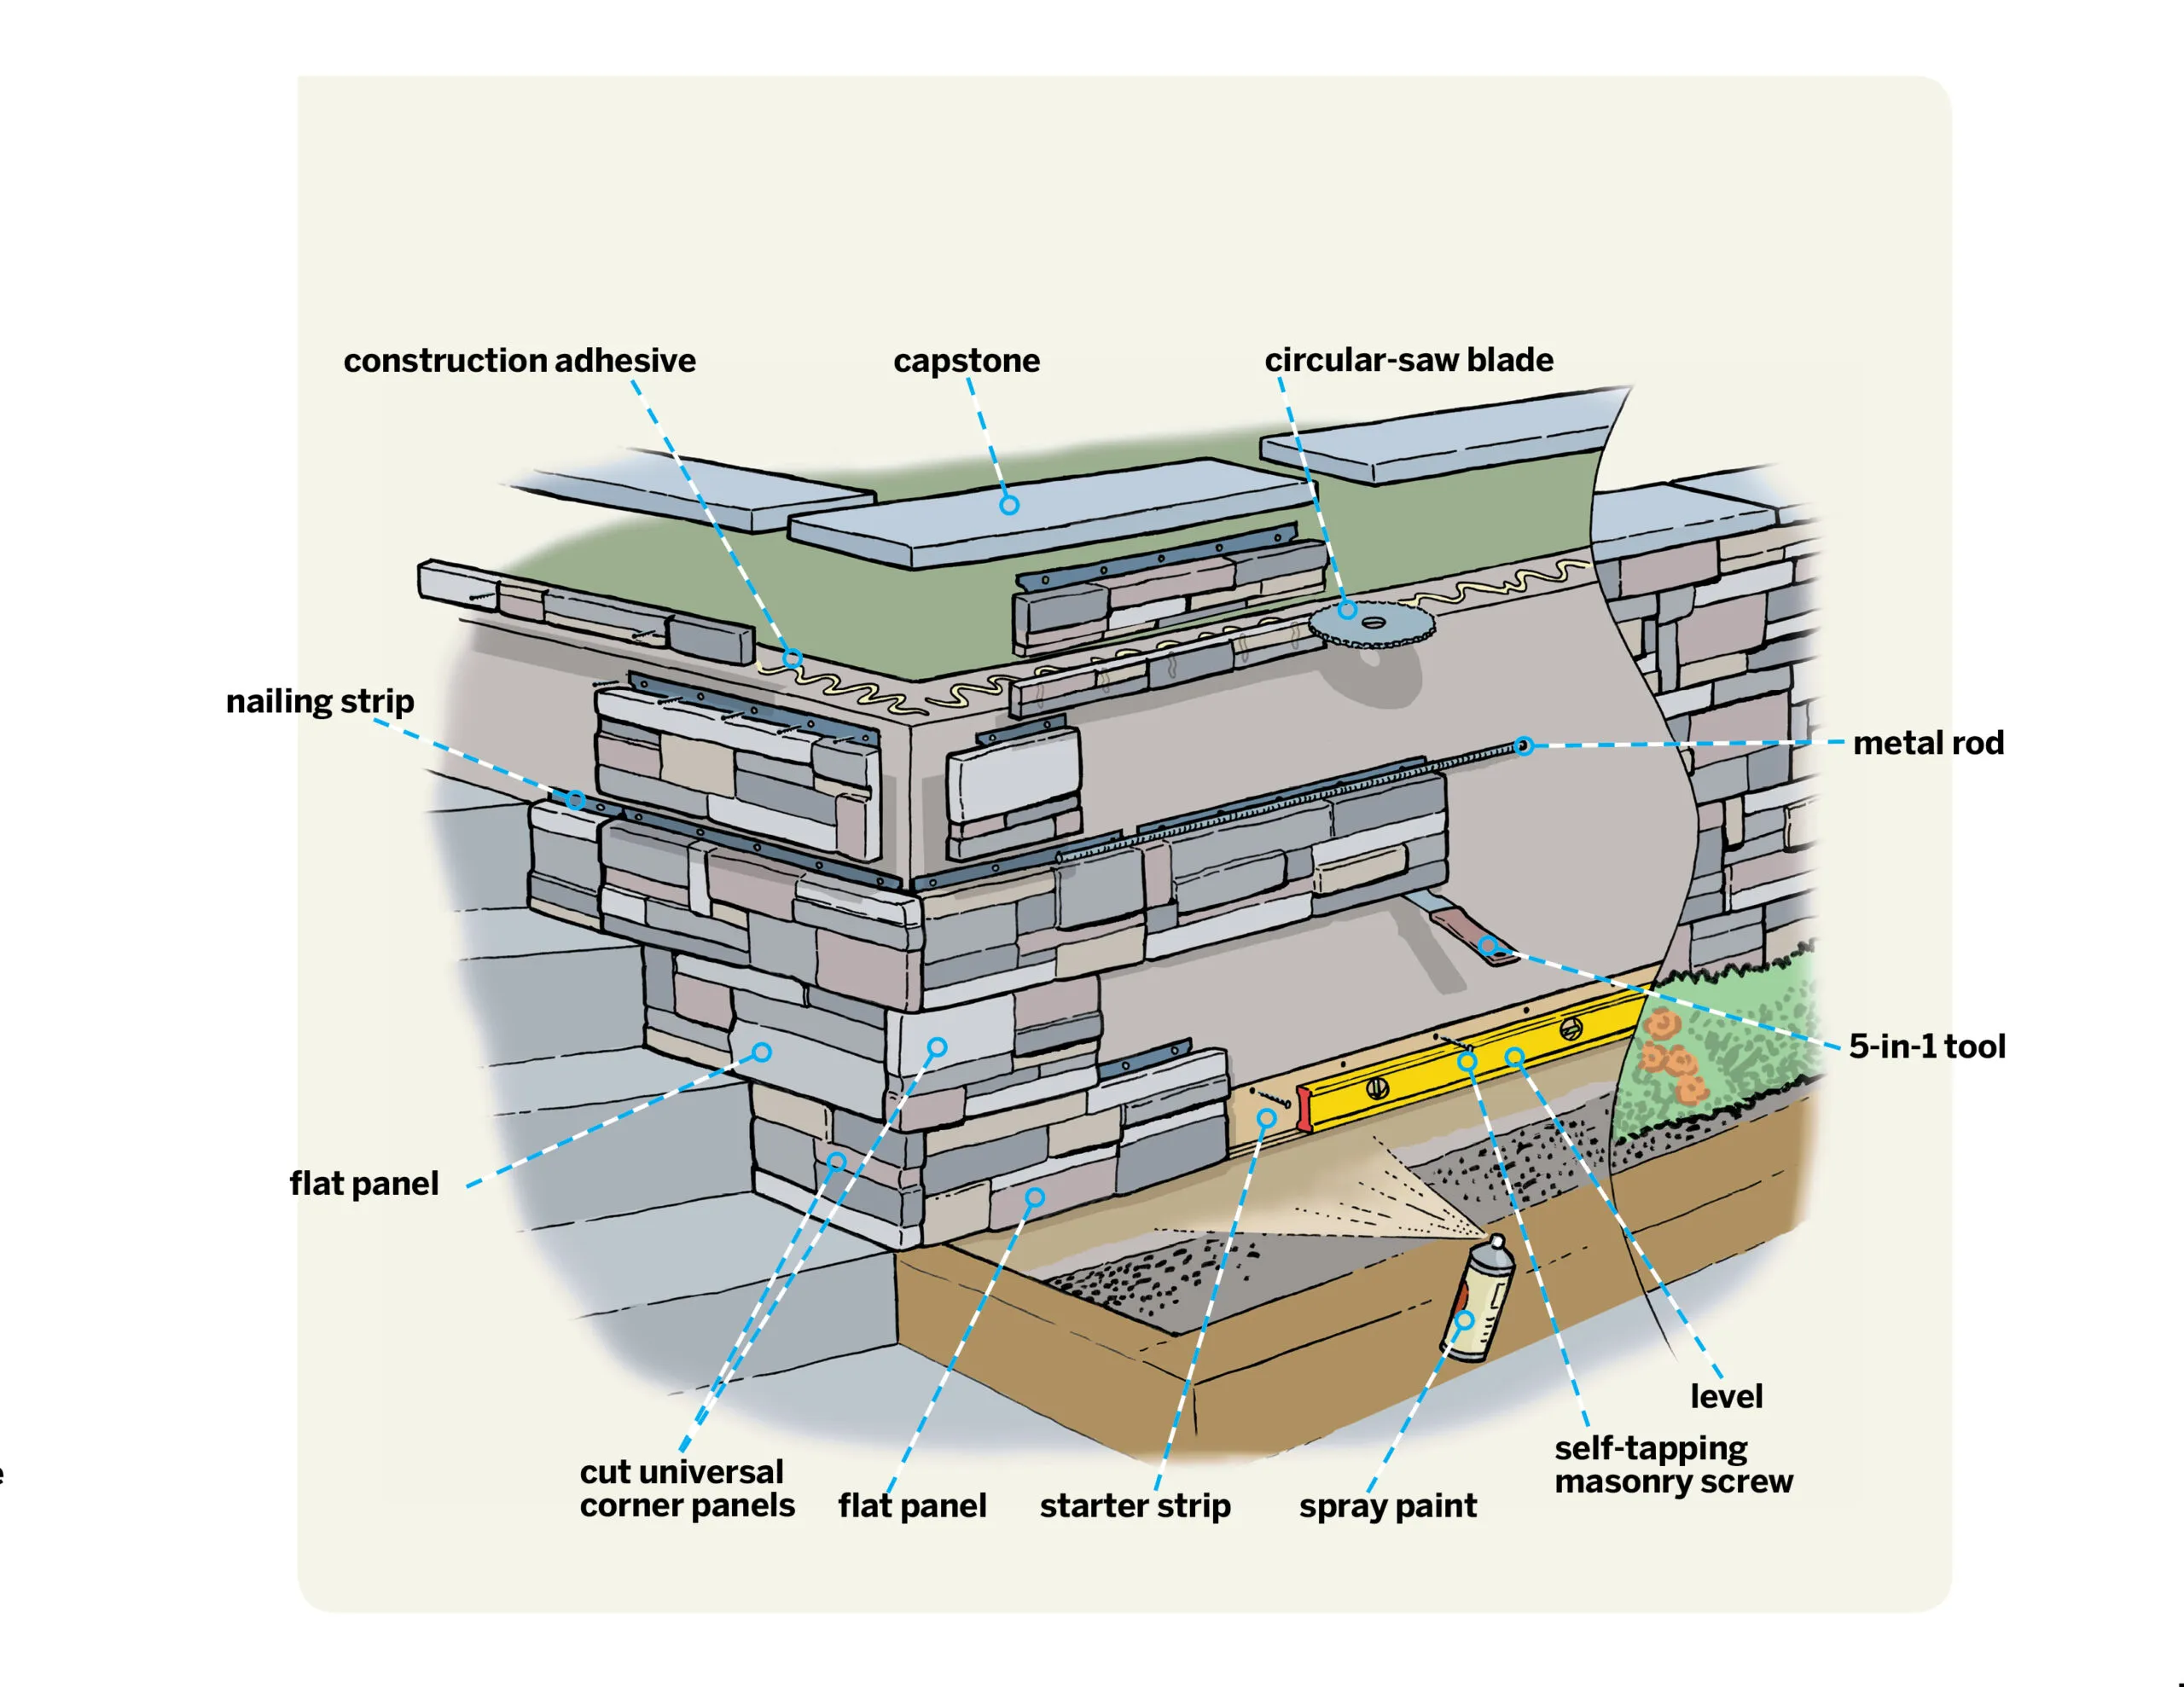
The panels must be installed above ground level, resting on a plastic support called a starter strip, so you’ll want to paint the wall below the strip to match the stone. Find a spray-paint color similar to the palette of your stone panels and paint the bottom few inches of the wall.
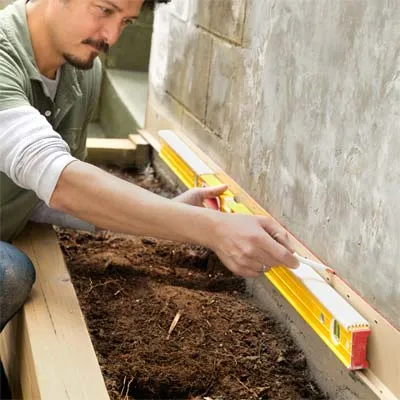
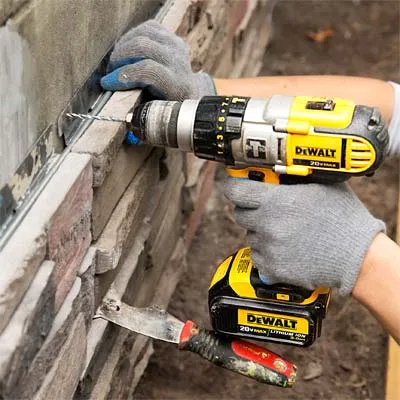
Set the location for the starter strip, at least 2 inches above any soil. Here, the strip’s lip aligns with the top of a stair on the adjacent side of the corner. Fit your drill/driver with a 3/16-inch masonry bit and drill a pilot hole through a slot in the strip near the corner and into the wall. Drive in a masonry screw to secure that end, then use the 4-foot level to bring the strip to level, and mark a line, as shown. Drill pilot holes and fasten the strip in two or three more spots, maintaining level.
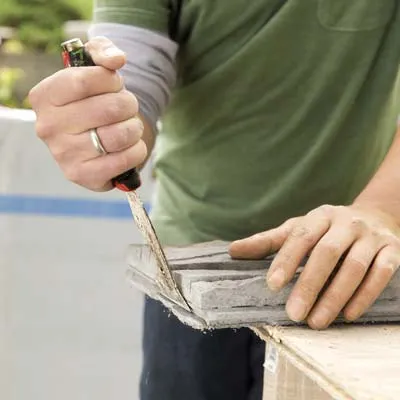
Platte panelen hebben aan elke kant een lipje dat in de sleuven van aangrenzende platte panelen past, maar moet worden verwijderd van elk uiteinde dat een hoek vormt. Laat het paneel met de voorkant naar boven op een werkoppervlak rusten en gebruik het mes van het 5-in-1-gereedschap om het lipje eraf te slaan, zoals weergegeven. De resulterende platte rand zorgt voor een strakke hoek.
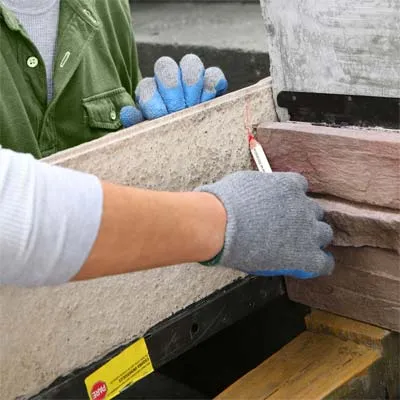
Elke run begint bij een hoek, waarbij het afgewerkte uiteinde van een universele hoek het uiteinde van een plat paneel overlapt (waarbij het lipje is verwijderd). Eerst wordt de universele hoek in twee stukken gesneden; de afgewerkte rand van elk stuk begint een cursus, en de snijrand komt uit in een vlak paneel. Voor de esthetiek knipt u de universele hoek zo af dat elk stuk minstens 20 cm lang is. Of, zoals in ons geval, knip het op maat tegen de trapverhoger: laat een plat paneel op de aangrenzende zijde in de starterstrip rusten, draai vervolgens de universele hoek ondersteboven, leg de afgewerkte rand tegen de trapverhoger en teken een snijlijn , zoals getoond.
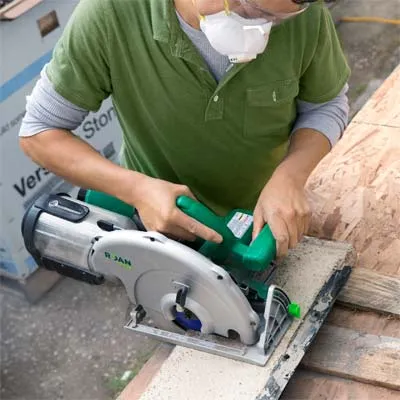
Laat het gemarkeerde paneel met de voorkant naar beneden op een werkoppervlak rusten met schrootplanken eronder aan weerszijden van de snijlijn. Gebruik een liniaal om een rechte snijlijn langs het smalste punt van de afgetekende lijn te markeren. Monteer de cirkelzaag met een gesegmenteerd diamantzaagblad en zaag langs de lijn, zowel door het beton als door de metalen spijkerstrip. Zorg ervoor dat u een veiligheidsbril, een stofmasker en gehoorbescherming draagt.
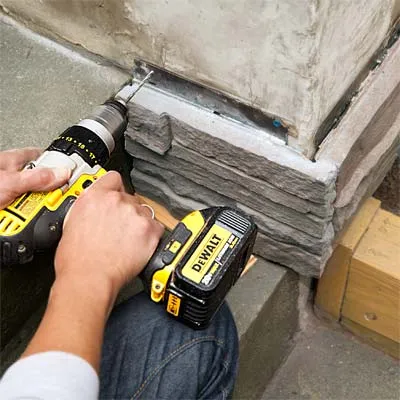
Hold the cut universal corner against the wall, bringing its finished end flush with the face of the adjacent flat panel so that the two pieces form a 90° outside corner. Level the universal corner, and drill pilot holes through the nailing strip, as shown, directly through the metal if necessary, in at least two places. Fasten the panel with 1¼-inch self-tapping masonry screws.
Tip: Houd uw bit ronddraaiend om stof te verwijderen terwijl u de boor uit het geleidegat haalt, zodat de metselschroef in het beton kan tikken.
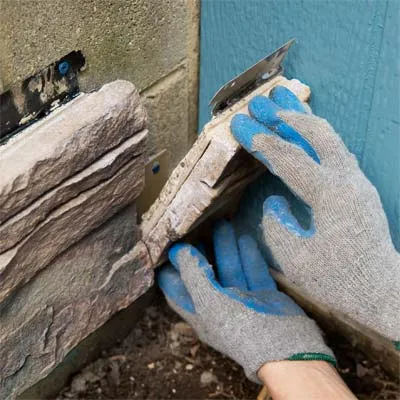
Ga door met het installeren van full-size flatpanels en werk gaandeweg het parcours af. Wanneer u het einde nadert, meet en knipt u een gedeeltelijk paneel om het einde van de baan te vullen. Als het uitgesneden stuk aan beide kanten een lipje heeft, gebruik dan het 5-in-1-gereedschap om het eraf te kloppen. Plaats het stuk op zijn plaats, boor gaten en schroef het aan de muur.

Use the cut half of the universal corner from the first course, positioned on the opposite side of the corner to stagger the joints. Slip the tongue on its bottom edge into the groove on top of the flat panel beneath. Position a flat panel, with its tab removed, atop the universal corner in the first course. Be sure it’s cut to a different length than the piece beneath, to offset the joints across the wall. Mark and drill pilot holes for the universal corner, secure it, and install the adjacent flat panel to complete the corner.
Work along the course, brushing out debris from the top groove to ensure that the panels fit together snugly. As you set each new panel, make sure that it’s aligned with the previous panel by nestling a ¼-inch metal rod in the groove along the top edge. The rod should lie flat and bridge the grooves in adjacent panels. If it doesn’t, use the 5-in-1 tool to shim the panel up, or back several screws out of the previous panel and adjust it. When the panels align, drill pilot holes and fasten them to the wall.

If the end of a panel falls in line with a joint on any of the previous courses, you’ll want to cut down its length slightly to maintain staggered joints. Hold the panel in place and mark the nailing strip at a different length. Transfer the mark to the back of the panel, cut it to size, and fasten it to the wall.
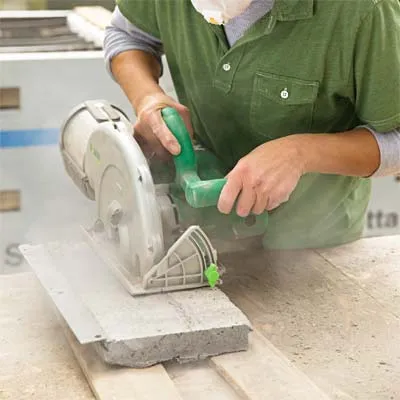
On the final course, you’ll need to cut down the height of the panels to fit, removing the nailing strip so that the stone reaches to the top of the wall. Rest a flat panel in place and scribe a cutline on the back at the height of the wall. Set the panel on a work surface, and use the circular saw to cut it to the proper height. You may want to cut your corner pieces to length first, then cut them to the proper height, as shown. Dry-fit the two pieces at the corner to check the fit.
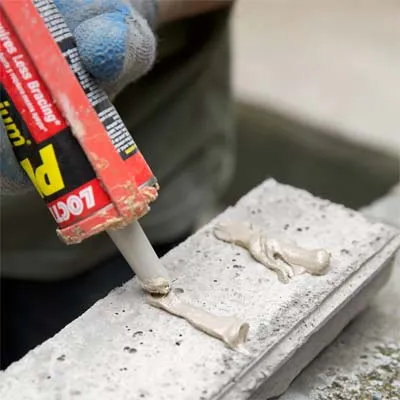
Verwijder de hoekpanelen en breng rechte banen constructielijm aan op de achterkant van elk stuk in verticale banen, zoals weergegeven, zodat het water vrij achter de panelen kan stromen en goed kan wegvloeien. Plaats de panelen op hun plaats op de muur en pas ze aan zodat ze goed in de hoek passen.
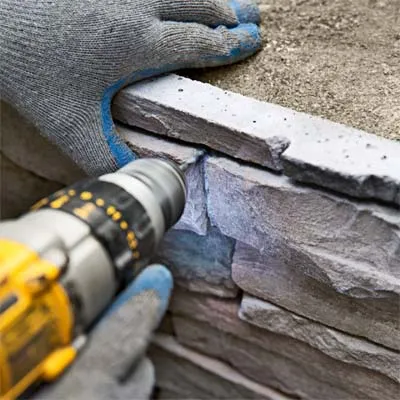
Om de afgezaagde panelen verder vast te zetten, moet u op elk paneel meerdere plekken zoeken waar u onopvallend een bevestigingsmiddel in de voegen tussen de stenen kunt laten zinken. Houd het stuk op zijn plaats en boor een geleidegat door het paneel en in de muur. Draai een metselschroef erin en laat de kop onder het oppervlak van het paneel zinken. Bedek de schroefkoppen met kit, verzamel wat stof van de snijtafel en blaas het op de drogende kit om het te camoufleren. Op dezelfde manier kunt u eventuele gaten bijwerken. Rond het installeren van de panelen af in de laatste cursus.
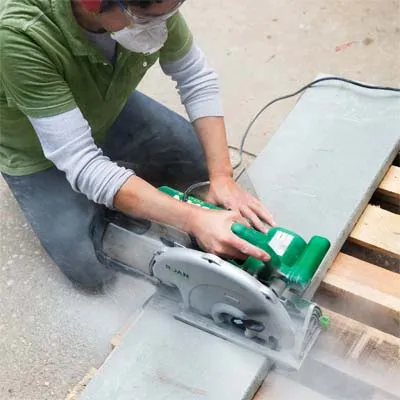
Selecteer een deksteen die enkele centimeters breder is dan de diepte van uw beklede muur om een overhang te creëren. Meet en markeer de dekstenen zodat ze langs de bovenkant van de muur passen. Gebruik de cirkelzaag en het gesegmenteerde diamantzaagblad om op lengte te zagen, zoals afgebeeld.
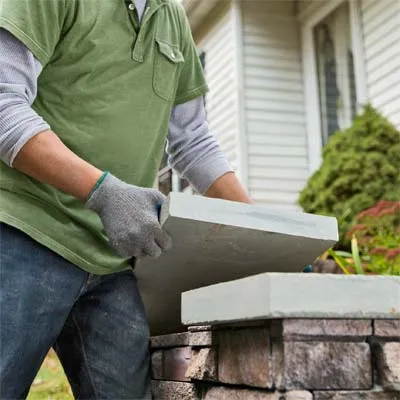
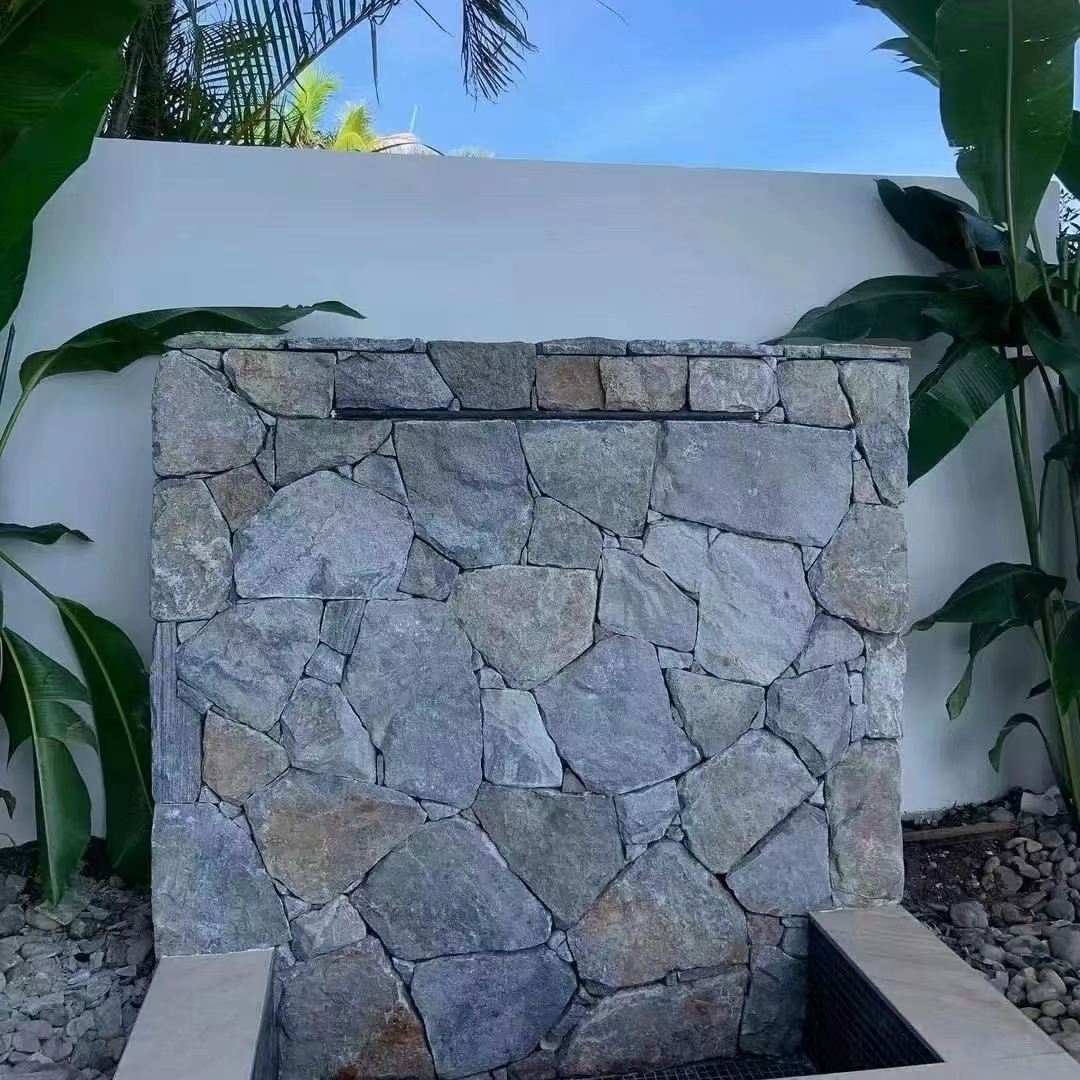
Werk samen met een partner, til de dekstenen op en plaats ze droog op de muur. Verwijder ze en breng constructielijm aan op de bovenkant van de muur en de randen van het fineer voordat u de stenen opnieuw plaatst; Of, als u de voorkeur geeft aan een nog authentiekere uitstraling, plaatst u ze in een stevig mortelbed. Doe nu een stapje terug en bewonder de naadloze look.
 Afrikaanse
 Albanees
 Amhaars
 Arabisch
 Armeens
 Azerbeidzjaans
 baskisch
 Wit-Russisch
 Bengaals
 Bosnisch
 Bulgaars
 Catalaans
 Cebuano
 China
 China (Taiwan)
 Corsicaans
 Kroatisch
 Tsjechisch
 Deens
 Nederlands
 Engels
 Esperanto
 Ests
 Fins
 Frans
 van Friesland afkomstige
 Galicisch
 Georgisch
 Duits
 Grieks
 Gujarati
 Haïtiaans Creools
 huis
 Hawaiiaans
 Hebreeuws
 Nee
 Miao
 Hongaars
 IJslands
 igbo
 Indonesisch
 Iers
 Italiaans
 Japans
 Javaans
 Kannada
 Kazachs
 Khmer
 Rwandese
 Koreaans
 Koerdisch
 Kirgizisch
 TB
 Latijns
 Lets
 Litouws
 Luxemburgs
 Macedonisch
 Malgashi
 Maleis
 Malayalam
 Maltees
 Maori
 Marathi
 Mongools
 Myanmar
 Nepalees
 Noors
 Noors
 Occitaans
 Pasjto
 Perzisch
 Pools
 Portugees
 Punjabi
 Roemeense
 Russisch
 Samoaans
 Schots-Gaelisch
 Servisch
 Engels
 Shona
 Sindhi
 Singalees
 Slowaaks
 Sloveens
 Somalisch
 Spaans
 Soendanees
 Swahili
 Zweeds
 Tagalog
 Tadzjiekse
 Tamil
 Tataars
 Telugu
 Thais
 Turks
 Turkmeens
 Oekraïens
 Urdu
 Oeigoerse
 Oezbeeks
 Vietnamees
 Welsh