ເວລາ:
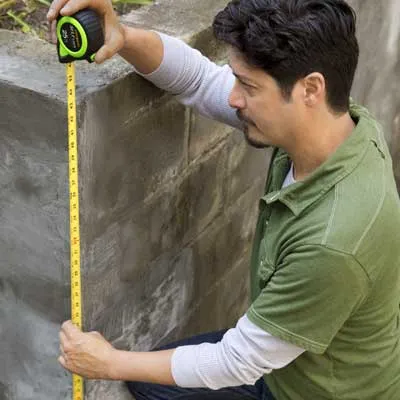
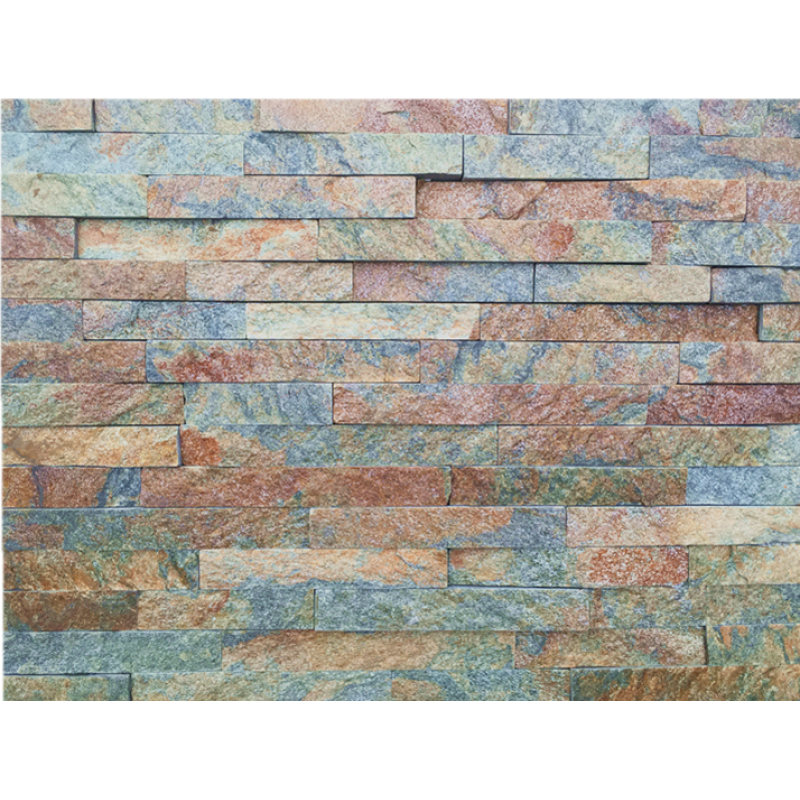
To calculate the number of universal corners to order, measure the height in inches of each outside wall corner, as shown, divide by 16, and round up to the nearest whole number. You’ll fill the area between the corners with flat panels. To calculate how many you’ll need, multiply the wall’s width by its height in feet and divide the resulting area by 2 (each panel covers 2 square feet). Subtract the number of universal corners from the result, then add 10 percent to your order of flat panels. Add one universal corner to be safe.
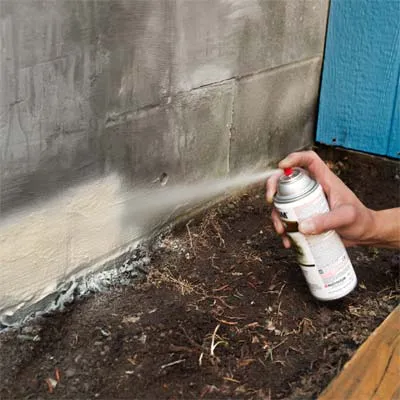
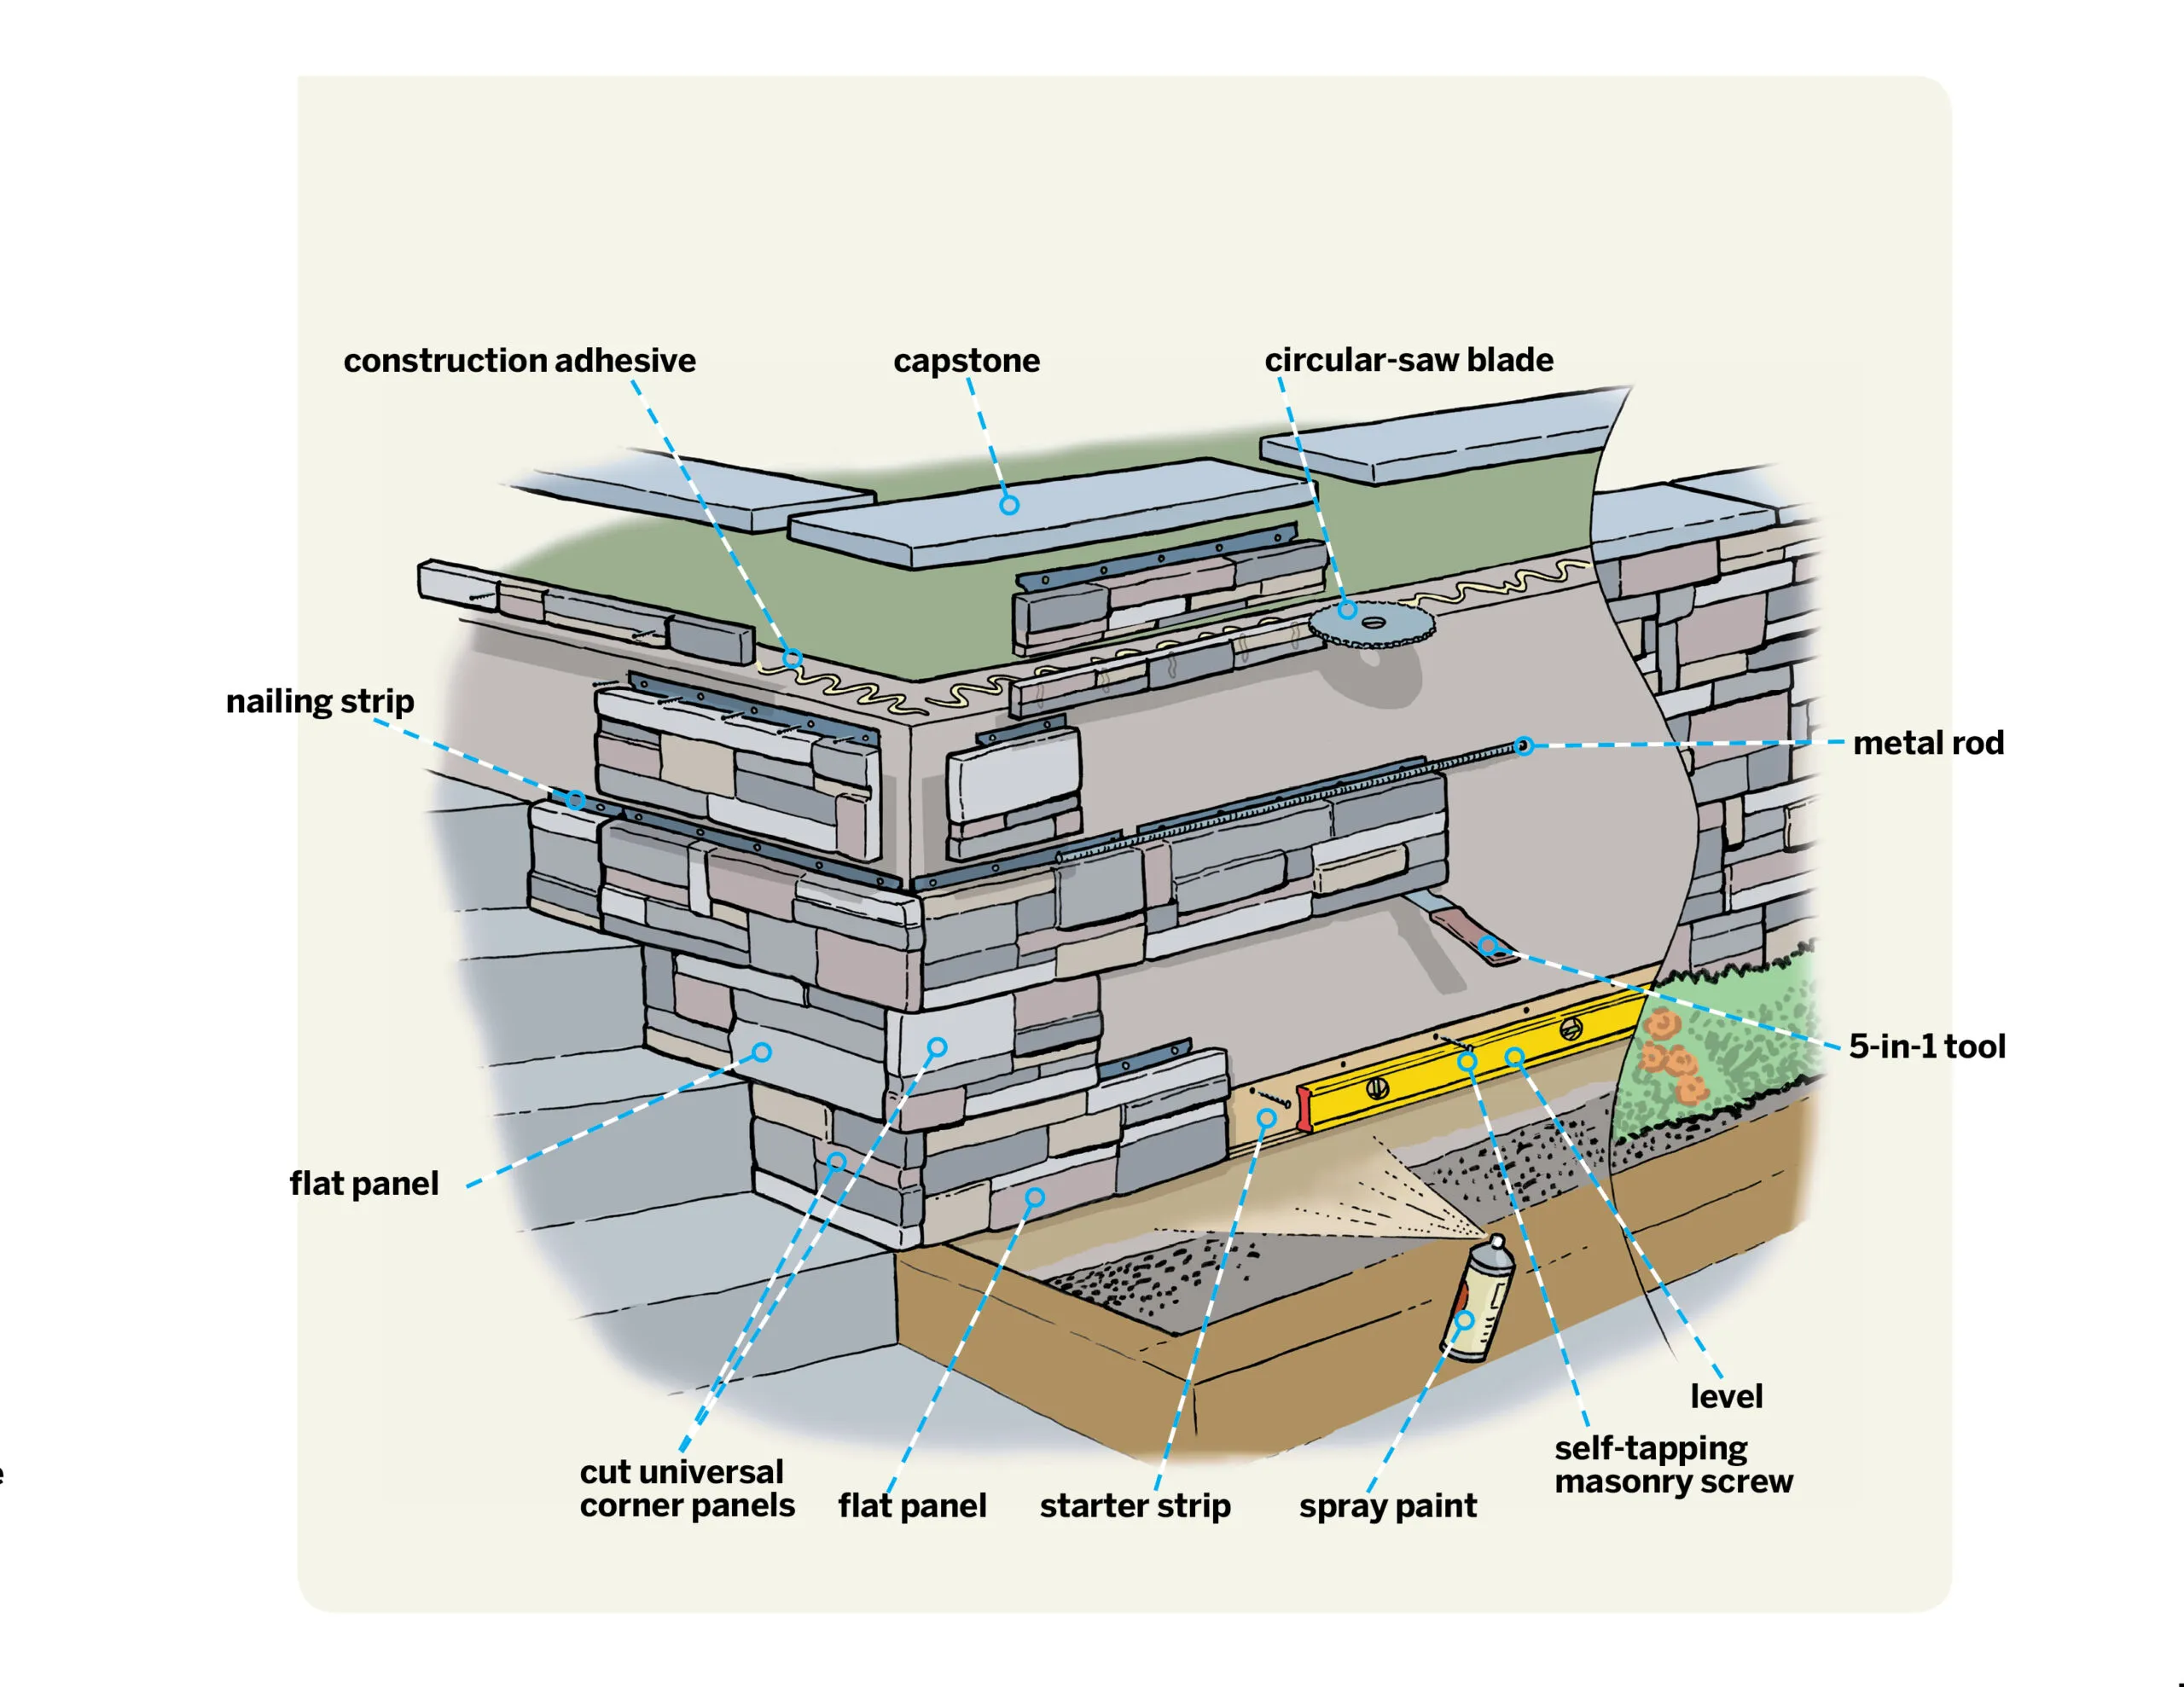
The panels must be installed above ground level, resting on a plastic support called a starter strip, so you’ll want to paint the wall below the strip to match the stone. Find a spray-paint color similar to the palette of your stone panels and paint the bottom few inches of the wall.
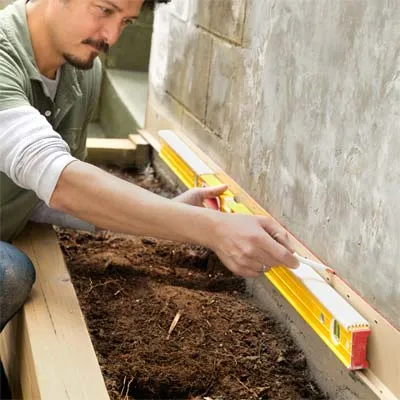
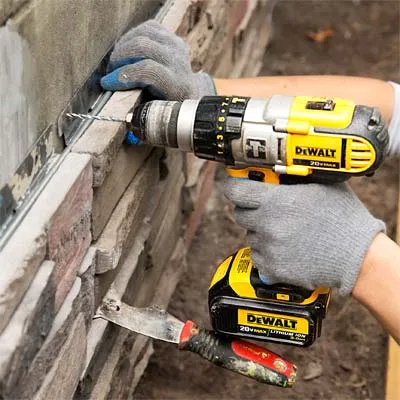
Set the location for the starter strip, at least 2 inches above any soil. Here, the strip’s lip aligns with the top of a stair on the adjacent side of the corner. Fit your drill/driver with a 3/16-inch masonry bit and drill a pilot hole through a slot in the strip near the corner and into the wall. Drive in a masonry screw to secure that end, then use the 4-foot level to bring the strip to level, and mark a line, as shown. Drill pilot holes and fasten the strip in two or three more spots, maintaining level.
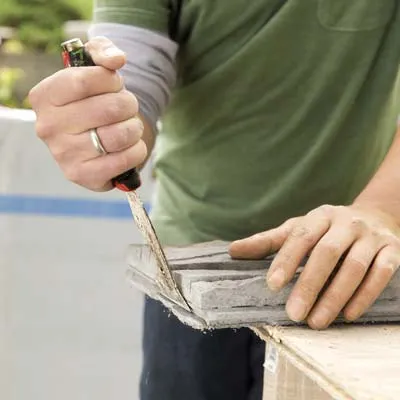
ແຜງຮາບພຽງມີແຖບຢູ່ແຕ່ລະດ້ານທີ່ມີຕາຫນ່າງທີ່ມີຊ່ອງໃສ່ກະດານຮາບພຽງຢູ່ຕິດກັນແຕ່ຈໍາເປັນຕ້ອງເອົາອອກຈາກປາຍໃດໆທີ່ເປັນມຸມ. ວາງໜ້າກະດານໄວ້ເທິງໜ້າວຽກ ແລະ ໃຊ້ໃບໜ້າຂອງເຄື່ອງມື 5-in-1 ເພື່ອລົບແຖບອອກ, ດັ່ງທີ່ເຫັນ. ຂອບຮາບພຽງທີ່ເປັນຜົນໄດ້ຮັບຈະເຮັດໃຫ້ມຸມແຫນ້ນແຫນ້ນ.
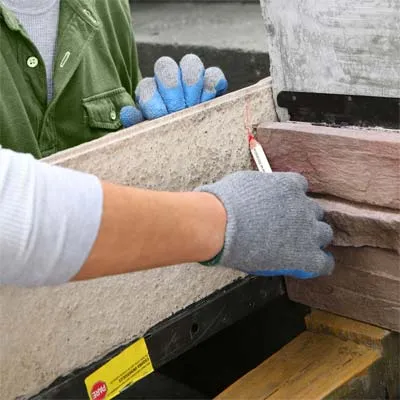
ການແລ່ນແຕ່ລະຄັ້ງເລີ່ມຕົ້ນຢູ່ມຸມໜຶ່ງ, ໂດຍທີ່ປາຍສຸດຂອງມຸມສາກົນທີ່ຊ້ອນກັນຢູ່ປາຍຂອງກະດານຮາບພຽງ (ໂດຍເອົາແຖບອອກ). ຫນ້າທໍາອິດ, ແຈທົ່ວໄປຖືກຕັດອອກເປັນສອງຕ່ອນ; ແຂບສໍາເລັດຮູບຂອງແຕ່ລະຊິ້ນຈະເລີ້ມຫຼັກສູດ, ແລະການຕັດແຂບ butts ເຂົ້າໄປໃນກະດານຮາບພຽງ. ສໍາລັບຄວາມງາມ, ຕັດມຸມທົ່ວໄປເພື່ອໃຫ້ແຕ່ລະຊິ້ນມີຄວາມຍາວຢ່າງຫນ້ອຍ 8 ນິ້ວ. ຫຼື, ເຊັ່ນດຽວກັບກໍລະນີຂອງພວກເຮົາ, ຕັດມັນໃຫ້ພໍດີກັບ riser ຂັ້ນໄດ: ວາງກະດານຮາບພຽງຢູ່ດ້ານຕິດກັນໃນແຖບເລີ່ມຕົ້ນ, ຫຼັງຈາກນັ້ນ, ໝຸນມຸມທົ່ວໄປໃຫ້ຫົວຂຶ້ນ, ຕີຂອບສໍາເລັດຮູບຂອງຕົນຕໍ່ກັບ riser ຂັ້ນໄດ, ແລະຂຽນເສັ້ນຕັດ. , ດັ່ງທີ່ສະແດງ.
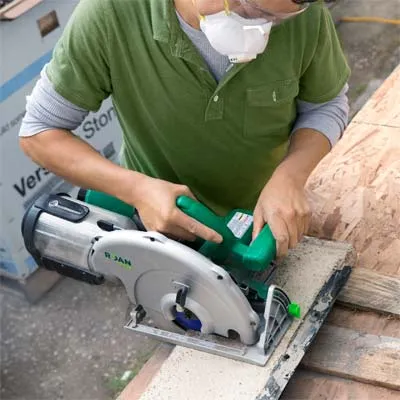
ວາງກະດານທີ່ຖືກໝາຍໄວ້ເທິງໜ້າວຽກດ້ວຍກະດານຂູດຢູ່ລຸ່ມມັນທັງສອງດ້ານຂອງເສັ້ນຕັດ. ໃຊ້ເສັ້ນຊື່ເພື່ອໝາຍເສັ້ນຕັດສີ່ຫຼ່ຽມອອກຕາມຈຸດທີ່ແຄບທີ່ສຸດຂອງເສັ້ນທີ່ຂຽນໄວ້. ພໍດີກັບເລື່ອຍວົງມົນດ້ວຍແຜ່ນໃບເພັດທີ່ແບ່ງເປັນສ່ວນໆ ແລະຕັດຕາມເສັ້ນ, ຜ່ານທາງຄອນກຣີດເຊັ່ນດຽວກັນກັບແຖບຕະປູໂລຫະ. ໃຫ້ແນ່ໃຈວ່າໃສ່ແວ່ນຕານິລະໄພ, ຫນ້າກາກຂີ້ຝຸ່ນ, ແລະປ້ອງກັນການໄດ້ຍິນ.
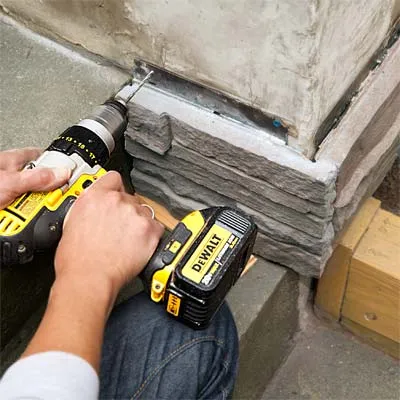
Hold the cut universal corner against the wall, bringing its finished end flush with the face of the adjacent flat panel so that the two pieces form a 90° outside corner. Level the universal corner, and drill pilot holes through the nailing strip, as shown, directly through the metal if necessary, in at least two places. Fasten the panel with 1¼-inch self-tapping masonry screws.
ເຄັດລັບ: ຮັກສາການຫມຸນເລັກນ້ອຍຂອງທ່ານເພື່ອເອົາຂີ້ຝຸ່ນອອກໃນຂະນະທີ່ທ່ານເອົາເຄື່ອງເຈາະອອກຈາກຂຸມທົດລອງ, ປ່ອຍໃຫ້ screw ກໍ່ສ້າງທໍ່ເຂົ້າໄປໃນຄອນກີດ.
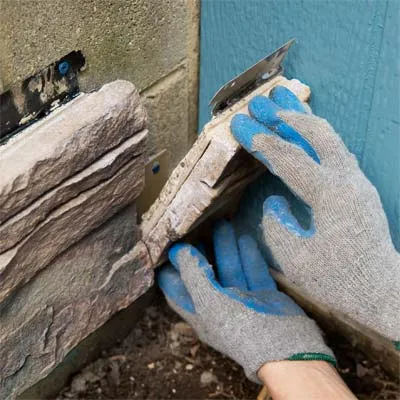
ສືບຕໍ່ຕິດຕັ້ງແຜງແບນຂະໜາດເຕັມ, ເຮັດວຽກຕາມເສັ້ນທາງ. ເມື່ອທ່ານໃກ້ທີ່ສຸດ, ວັດແທກແລະຕັດແຖບບາງສ່ວນເພື່ອຕື່ມຂໍ້ມູນໃນຕອນທ້າຍຂອງຫຼັກສູດ. ຖ້າຊິ້ນສ່ວນທີ່ຖືກຕັດມີແຖບຢູ່ດ້ານໃດກໍ່ຕາມ, ໃຊ້ເຄື່ອງມື 5-in-1 ເພື່ອລົບມັນອອກ. ວາງຊິ້ນສ່ວນໃຫ້ພໍດີ, ເຈາະຮູທົດລອງ, ແລະ screw ມັນກັບຝາ.

Use the cut half of the universal corner from the first course, positioned on the opposite side of the corner to stagger the joints. Slip the tongue on its bottom edge into the groove on top of the flat panel beneath. Position a flat panel, with its tab removed, atop the universal corner in the first course. Be sure it’s cut to a different length than the piece beneath, to offset the joints across the wall. Mark and drill pilot holes for the universal corner, secure it, and install the adjacent flat panel to complete the corner.
Work along the course, brushing out debris from the top groove to ensure that the panels fit together snugly. As you set each new panel, make sure that it’s aligned with the previous panel by nestling a ¼-inch metal rod in the groove along the top edge. The rod should lie flat and bridge the grooves in adjacent panels. If it doesn’t, use the 5-in-1 tool to shim the panel up, or back several screws out of the previous panel and adjust it. When the panels align, drill pilot holes and fasten them to the wall.

If the end of a panel falls in line with a joint on any of the previous courses, you’ll want to cut down its length slightly to maintain staggered joints. Hold the panel in place and mark the nailing strip at a different length. Transfer the mark to the back of the panel, cut it to size, and fasten it to the wall.
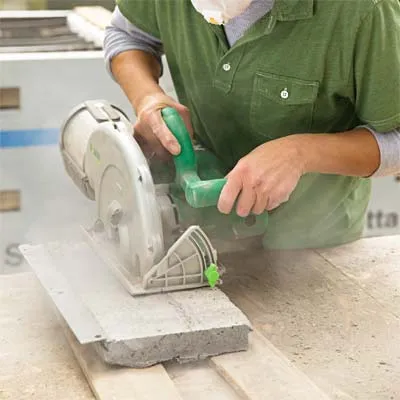
On the final course, you’ll need to cut down the height of the panels to fit, removing the nailing strip so that the stone reaches to the top of the wall. Rest a flat panel in place and scribe a cutline on the back at the height of the wall. Set the panel on a work surface, and use the circular saw to cut it to the proper height. You may want to cut your corner pieces to length first, then cut them to the proper height, as shown. Dry-fit the two pieces at the corner to check the fit.
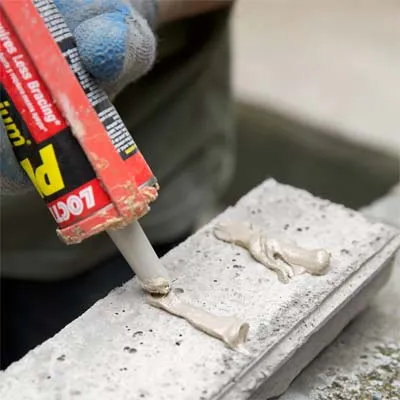
ຖອດແຖບມຸມອອກແລະນໍາໃຊ້ລູກປັດຊື່ຂອງກາວກໍ່ສ້າງຢູ່ດ້ານຫລັງຂອງແຕ່ລະຊິ້ນໃນແນວຕັ້ງ, ດັ່ງທີ່ສະແດງ, ດັ່ງນັ້ນນ້ໍາແມ່ນບໍ່ເສຍຄ່າເພື່ອໄຫຼຢູ່ຫລັງກະດານແລະລະບາຍນ້ໍາຢ່າງຖືກຕ້ອງ. ຕັ້ງແຜງຢູ່ໃສ່ຝາ ແລະປັບໃຫ້ພໍດີກັບມຸມ.
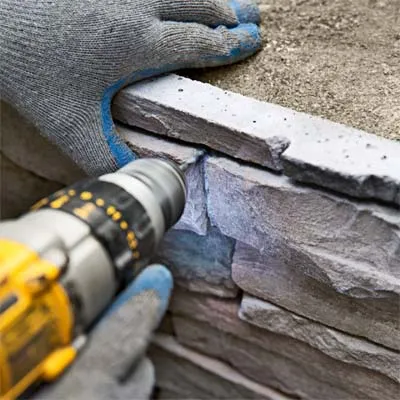
ເພື່ອຮັບປະກັນເພີ່ມເຕີມຂອງແຜງຕັດລົງ, ຊອກຫາຈຸດຫຼາຍຈຸດໃນແຕ່ລະບ່ອນທີ່ທ່ານສາມາດຈົມຕົວຍຶດທີ່ບໍ່ຊັດເຈນຢູ່ໃນຂໍ້ຕໍ່ລະຫວ່າງແກນ. ຖືຊິ້ນສ່ວນຢູ່ໃນສະຖານທີ່, ເຈາະຮູທົດລອງຜ່ານກະດານແລະເຂົ້າໄປໃນກໍາແພງ. ຂັບດ້ວຍສະກູກໍ່ສ້າງ, ຈົມຫົວຢູ່ໃຕ້ພື້ນຜິວຂອງກະດານ. ກວມເອົາຫົວ screwheads ດ້ວຍ caulk, ເກັບຂີ້ຝຸ່ນຈາກຕາຕະລາງຕັດ, ແລະ blows ມັນໃສ່ caulk ຕາກແດດໃຫ້ແຫ້ງເພື່ອ camouflage ມັນ. ທ່ານສາມາດແຕະຊ່ອງຫວ່າງໃນລັກສະນະດຽວກັນ. ສໍາເລັດການຕິດຕັ້ງແຜງໃນຫຼັກສູດສຸດທ້າຍ.
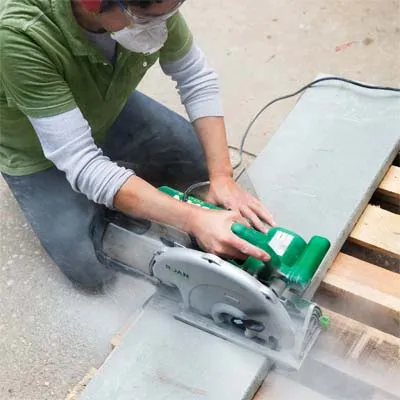
ເລືອກຝາອັດປາກຂຸມຫຼາຍນິ້ວກວ້າງກວ່າຄວາມເລິກຂອງຝາຜະໜັງຂອງເຈົ້າເພື່ອສ້າງຝາປິດ. ວັດແທກແລະຫມາຍ capstones ໃຫ້ພໍດີກັບເທິງຂອງກໍາແພງຫີນ. ໃຊ້ເລື່ອຍວົງກົມ ແລະ ແຜ່ນໃບເພັດຕັດເປັນສ່ວນໆຕາມຮູບ.
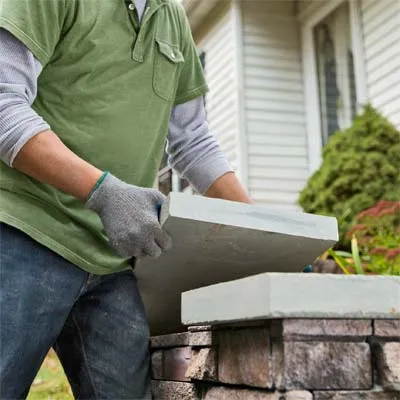
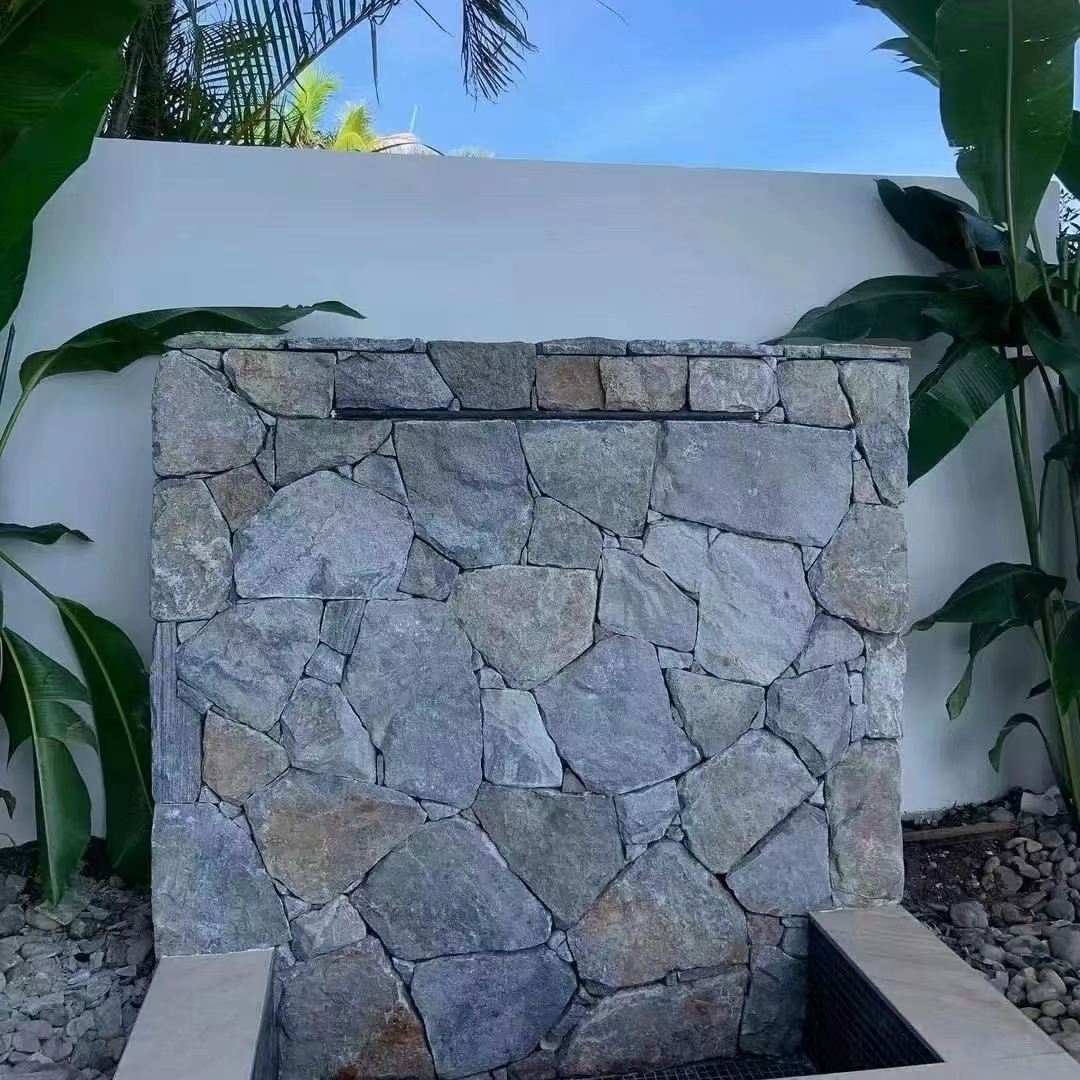
ເຮັດວຽກກັບຄູ່ຮ່ວມງານ, ຍົກຝາອັດປາກຂຸມແລະຕາກແຫ້ງໃຫ້ພໍດີຢູ່ເທິງຝາ. ເອົາພວກມັນອອກແລະໃຊ້ກາວກໍ່ສ້າງໃສ່ດ້ານເທິງຂອງຝາແລະແຄມຂອງ veneer ກ່ອນທີ່ຈະຕັ້ງແກນຄືນໃຫມ່; ຫຼື, ຖ້າທ່ານຕ້ອງການເບິ່ງທີ່ແທ້ຈິງຫຼາຍ, ໃຫ້ພວກເຂົາຢູ່ໃນຕຽງປູນແຂງ. ຕອນນີ້ເອົາບາດກ້າວກັບຄືນ ແລະປະຫລາດໃຈກັບການເບິ່ງທີ່ບໍ່ລຽບງ່າຍ.
 ອາຟຣິກາ
 ອານບານີ
 Amharic
 ອາຣັບ
 ອາເມເນຍ
 ອາເຊີໄບຈັນ
 Basque
 ເບລາຣຸດ
 ເບັງກາລີ
 ໂບສເນຍ
 ບຸນກາຣີ
 ຄາຕາລານ
 ເຊບູອາໂນ
 ຈີນ
 ຈີນ (ໄຕ້ຫວັນ)
 Corsican
 ໂຄຣເອເຊຍ
 ເຊັກ
 ເດັນມາກ
 ໂຮນລັງ
 ພາສາອັງກິດ
 ເອສເປີຣັນໂຕ
 ເອສໂຕເນຍ
 ຟິນແລນ
 ພາສາຝຣັ່ງ
 Frisian
 ກາລິຊຽນ
 ຈໍເຈຍ
 ເຢຍລະມັນ
 ກຣີກ
 ກູຈາຣາຕີ
 ເຮຕີ ຄຣີໂອ
 ໂຮຊາ
 ຮາວາຍ
 ເຮັບເຣີ
 ບໍ່
 ມວຍ
 ຮັງກາຣີ
 ໄອສແລນຕິກ
 ອິກໂບ
 ອິນໂດເນເຊຍ
 ໄອແລນ
 ອິຕາລຽນ
 ພາສາຍີ່ປຸ່ນ
 ພາສາ Javanese
 ແຄນນາດາ
 ຄາຊັກ
 ຂະເໝນ
 ຣູວັນດາ
 ເກົາຫຼີ
 ຊາວເຄີດ
 ພາສາກີສ
 TB
 ລາຕິນ
 ລັດເວຍ
 ລິທົວເນຍ
 Luxembourgish
 ມາເຊໂດເນຍ
 ມາລກາຊິ
 ມາເລ
 ມາລາຢາລາມ
 Maltese
 Maori
 Marathi
 ມົງໂກລີ
 ມຽນມາ
 ເນປານ
 ນໍເວ
 ນໍເວ
 ໂອຊິຕັນ
 ພາສໂຕ
 ເປີເຊຍ
 ໂປໂລຍ
 ພາສາປອກຕຸຍການ
 ປັນຈາບີ
 ໂຣມາເນຍ
 ພາສາລັດເຊຍ
 ຊາມົວ
 Scottish Gaelic
 ເຊີເບຍ
 ພາສາອັງກິດ
 ໂຊນາ
 ຊິນດີ
 Sinhala
 ສະໂລວັກ
 ສະໂລເວເນຍ
 ໂຊມາລີ
 ແອສປາໂຍນ
 ຊູດານ
 ສະວາຮິລີ
 ຊູແອັດ
 ພາສາຕາກາລັອກ
 ທາຈິກ
 ທະມິນ
 ທາຕາ
 ເຕລູກູ
 ໄທ
 ຕວກກີ
 ເຕີກເມັນ
 ອູແກຣນ
 ອູດູ
 ອູຍເກີ
 ອຸສເບກ
 ຫວຽດນາມ
 ເວນ